If you’ve ever watch a lot of screen casts on Tuts+ or YouTube, you will have probably noticed that many of the people who are running the screen casts have really awesome terminal interfaces. They have a lot of color, are spaced out beautifully, and commonly use the full screen or something similar. Some of the people from Tuts+ are who really made me decide to go ahead and make some changes to my terminal. The specific people that made me want to do something more with my own terminal are Jeffrey Way and Andrew Burgess. Both of these gentlemen (also they are excellent teachers and I would highly recommend any of their tutorials) have amazing terminals and make such efficient use of them.
Please note that this tutorial is mainly going to be for OS X users. I will target specifically Mac applications and practices. Sorry to all you Linux users out there…
Our Terminal App
First thing’s first, deciding what terminal app to use. With a quick Google search I quickly found that both Jeffrey Way and Andrew Burgess use iTerm2, a free application that is meant to replace the default terminal app. Since I look up to these fine gentlemen, I started using iTerm2 and unless something really amazing comes along (something like when Sublime Text came out) I will be using iTerm2 from now on. Its an amazing Terminal app that is simple to understand but gives enough extra features that make it worth using over the native OS X Terminal app.
Download iTerm HERE and install it. Then move on to the next part of the tutorial!
iTerm Preferences
Lets take a look at some settings that will get iTerm running in (what I feel is) an optimal way. First lets take a look through the iTerm’s preferences. Open up iTerm and then hit Command+, to open up the preferences pane.
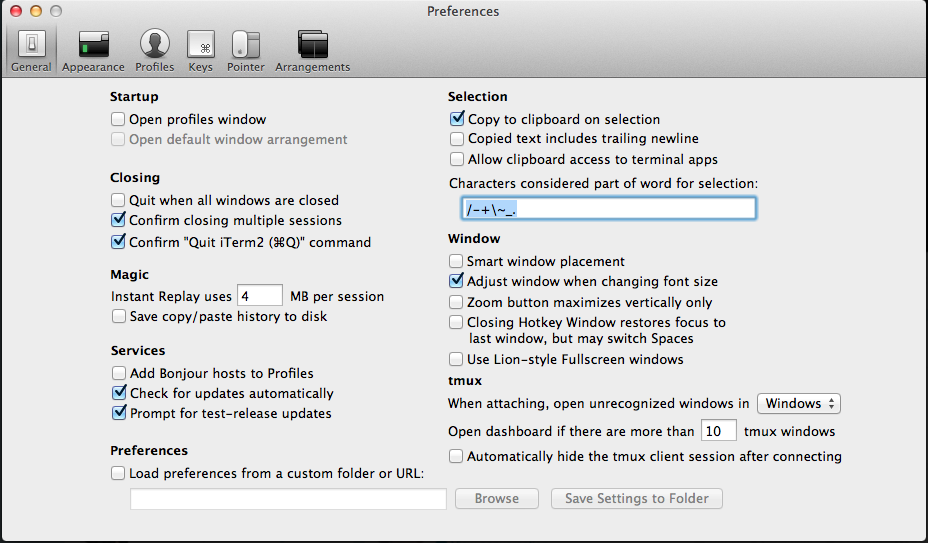
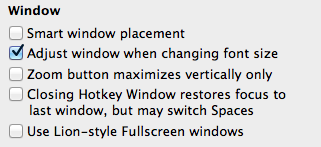
The first thing you will want to do is uncheck “Use Lion-style Fullscreen windows” on the General settings page (this is the default page when you open your preferences, so you should already be on this page).
Once that is done, navigate to the Profiles settings by hitting the profiles button on the top of the preferences pane. Here you can edit your default profile and name it whatever you want. Under the “Colors” tab, you can choose whatever you want. I personally use the “Pastel (Dark Background)” preset color scheme.
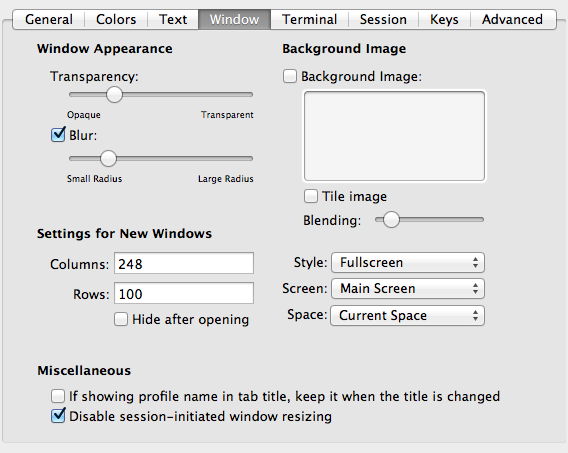
Next navigate to the Window section of your profile, and set the options so that they are the same as below (if you want to have the same type as my iTerm of course… really you can do what you want). The changes here are to the Transparency and setting the “Style” dropdown to “Fullscreen”. What this will enable us to do later, is to have a full screen overlay of our iTerm with some transparency so we can see our work in the background. This will all be activated by using a system wide hotkey to display and hide our iTerm window.
Let’s setup that system wide hotkey right now. Navigate to the “Keys” settings page on iTerm by clicking the “Keys” button at the top of the preferences pane. You can then set the hotkey to whatever you want (I personally use Command+Control+T).
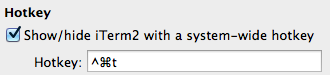
And that is everything for iTerm preferences that needs to be set. You can test out your settings by closing iTerm and then reopening it. The new iTerm window should be a fullscreen window with transparency that overlays your current screen. Then hit Command+Control+T and see if it hides it.
Start iTerm at Login
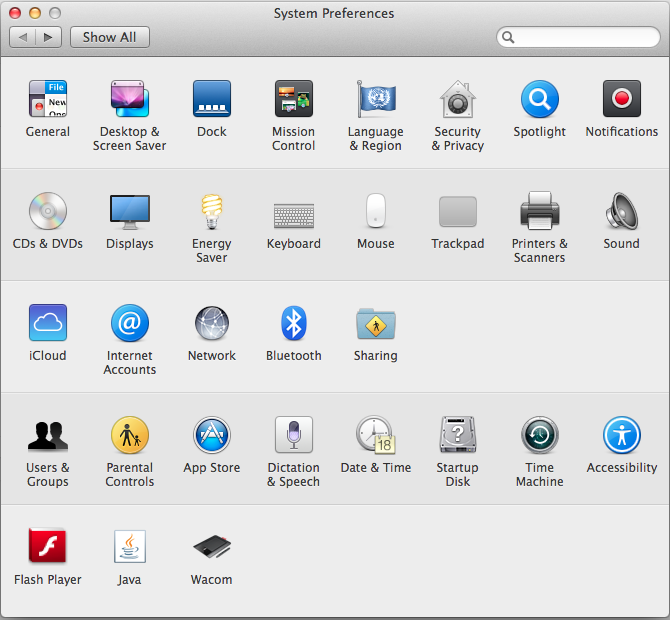
Next I like to setup iTerm to open automatically when I login. This allows the universal hotkey that we just created to work immediately, rather than forcing us to open iTerm first. I know it seems like a very small time saver, but its just annoying when you hit Command+Control+T and nothing happens, and its because you just logged in so iTerm isn’t open yet. To start the process, open your “System Preferences” and navigating to “Users and Groups”.
From here, you will want to select your “Login Items”
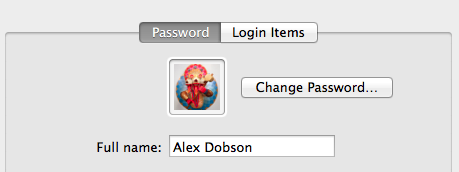
Then you will want to click the plus sign which will add a new login item. Select iTerm from your Applications folder.

Finally you will want to check the box that will hide iTerm on login. This way you won’t see the window pop up in your face, but it will be open in the background.
![]()
Now when you hit your universal hotkey for iTerm, it will be ready to go as soon as you login.
Customizing the Bash
The next step is to customize the actual look of our bash. This a little more complicated than changing other preferences, such as the ones we changed for iTerm. In order to change the look of your bash on the Mac, you must modify your .bash_profile file. You can do this using the nano editor.
Open up your iTerm and type the command:
From this will open up the Terminal text editor called Nano. You will want to copy in the following into your .bash_profile file:
This is actually a copy of my .bash_profile file. I will explain what everything means so you can customize it to your own liking.
The first two export statements allow for better colors in the terminal. This coupled with the “alias ls=’ls -GFh'” will provide awesome colors for your terminal ls commands.
The “alias subl” is an alias so I can open folders or files in Sublime Text from the Terminal. It is a great alias to have and everyone should add it. If you aren’t using Sublime Text then go DOWNLOAD it, start using it, and then make this alias. To use this just type subl file/folder-name to open a file or folder, or subl . to open the entire current folder.
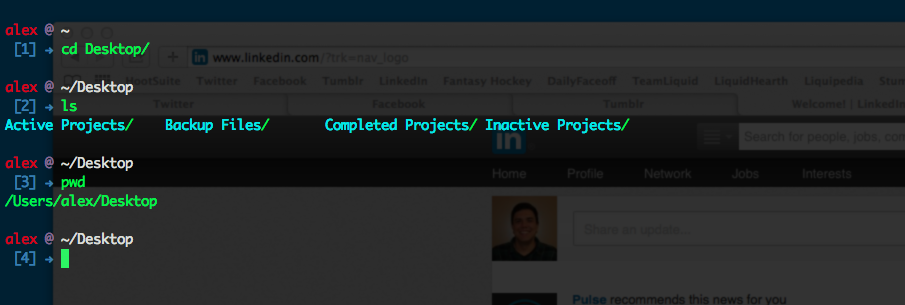
Now for the meat and potatoes of the bash customization, the prompt function. The prompt function is what exports the PS1, which is actually what your prompt in the bash is. This is where it looks different than the standard one. The color variables are obviously just that, colors for you to use. That way you can differentiate the different parts of your prompt. Note that the colors keep going until you define a new one. The DEFAULT variable will bring it back to the default for iTerm.
Finally I can give you a quick rundown of what the different commands do for the prompt. That way you can use what you want and leave out what you don’t want.
- \a an ASCII bell character (07)
- \d the date in “Weekday Month Date” format (e.g., “Tue May 26”)
- \D{format} – the format is passed to strftime(3) and the result is inserted into the prompt string; an empty format results in a locale-specific time representation. The braces are required
- \e an ASCII escape character (033)
- \h the hostname up to the first part
- \H the hostname
- \j the number of jobs currently managed by the shell
- \l the basename of the shell’s terminal device name
- \n newline
- \r carriage return
- \s the name of the shell, the basename of $0 (the portion following the final slash)
- \t the current time in 24-hour HH:MM:SS format
- \T the current time in 12-hour HH:MM:SS format
- \@ the current time in 12-hour am/pm format
- \A the current time in 24-hour HH:MM format
- \u the username of the current user
- \v the version of bash (e.g., 2.00)
- \V the release of bash, version + patch level (e.g., 2.00.0)
- \w the current working directory, with $HOME abbreviated with a tilde
- \W the basename of the current working directory, with $HOME abbreviated with a tilde
- \! the history number of this command
- \# the command number of this command
- \$ if the effective UID is 0, a #, otherwise a $
- \nnn the character corresponding to the octal number nnn
- \\ a backslash
- \[ begin a sequence of non-printing characters, which could be used to embed a terminal control sequence into the prompt
- \] end a sequence of non-printing character
And that’s really all there is to know about the basics of customizing your bash on your Mac. There are definitely way crazier things that people have done out there, including an awesome Git status indicator that I plan on looking more into (Hint: that will be a future tutorial), so please go check out more if you want to do something more.
As always thank you for reading and please share it around as much as you can! Please feel free to put any questions, suggestions, or ideas in the comments section below. You can also email me directly via alex@dobsondev.com.