![]()
In the last part of this tutorial series we went over basic Math and String operations. In this tutorial we are going to be expanding our knowledge of these two concepts by writing a program that outputs a personalized message to the user and their age in dog years. Since we will start writing multi-line Python programs – we will also have to look at our programming environment to get a better setup for writing more complex programs. If you haven’t already – please read Part I & Part II of this series before starting this article if you aren’t familiar with Python.
Setting Up A New Programming Environment
A programming environment is the set of programs that you use to create and run the programs you create. I want to note that you can actually write entire programs in IDLE by opening a new window. You can then type you program, save it and run it from IDLE. The only thing about using IDLE for everything is it’s not as robust as some of the other options for text editors or integrated development environments you can find – so we will be using one of those. There are an infinite number of possibilities for setting up a Python programming environment so we don’t have time to cover them all – but we will take a look at two different possibilities.
You can choose either one of these options and I’m going to trust you to read how to use them on the websites provided. There are detail instructions on how to install them and use them so please use those if you are confused. I highly recommend using an IDE if you are new to programming because it will make everything a lot easier to do the first time round.
Text Editor and Command Line
The text editor and command line environment is one of the most traditional. This environment consists of a text editor to write your programs and then a command line program to execute the programs. For example – on Windows you could use Notepad as your text editor and the Command Prompt as your command line program (both of which are natively installed on all Windows machines). You could also download third party software such as the awesome Notepad++ which I think it one of the best Window’s text editors (there’s even plugins for Notepad++ that will allow you to run Python right from the program – eliminating the need for the Command Prompt). If you were on a Mac you could use TextEdit as your text editor and Terminal as your command line (also both natively installed on all OS X distros).
With all the different text editors and command lines out there, it was pretty hard to recommend any as being any better than the others since I simply have used them. So I decided to list the ones I personally use and have had luck with. You can find them below for both Windows and Mac:
Windows
Mac
All the example code I write will be using Sublime Text 2 and iTerm2.
Integrated Development Environment
An integrated development environment (IDE) is a program that provides comprehensive tools to computer programmers for software development. An IDE normally consists of a source code editor, build automation tools and a debugger. This means that you only have to run the IDE to create and run your program.
While looking for a suitable IDE to recommend – I found that 3 stood out as the most popular online.
Feel free to choose any one you want – but I highly recommend PyCharm if you are looking to only program in Python and want a simple setup. Make sure you get the free community version of PyCharm and not the paid enterprise edition. PyDev for Eclipse requires two installs, because you have to first install Eclipse and then add PyDev to it. Komodo actually looks really impressive and can handle a lot of languages – so if you are planning to possibly branch out then I would highly recommend picking it up and using it. For this tutorial though I will be recommending you use PyCharm and going over how to create a project on it and run your first program. Instructions for how to install and run PyCharm can be seen below:
No matter what one you use – your Python programs should run the same and you will be able to make all the programs we do in this and future tutorials. You may have to do some reading online to figure out how some things work and how to configure some settings – but that’s all part of the learning experience of programming.
All of these IDE’s are available on both Windows and Mac. For this tutorial I will go over using PyCharm really quickly – but in future tutorials I will simply post the code snippets as GitHub Gist’s and you can run them in whatever IDE/however you want. All the example code I write will be using Sublime Text 2 and iTerm2.
Getting Started
The first thing we are going to want to do is test out our new development environment. We can do this by running the following program which only consists of commands we did in the last tutorial:
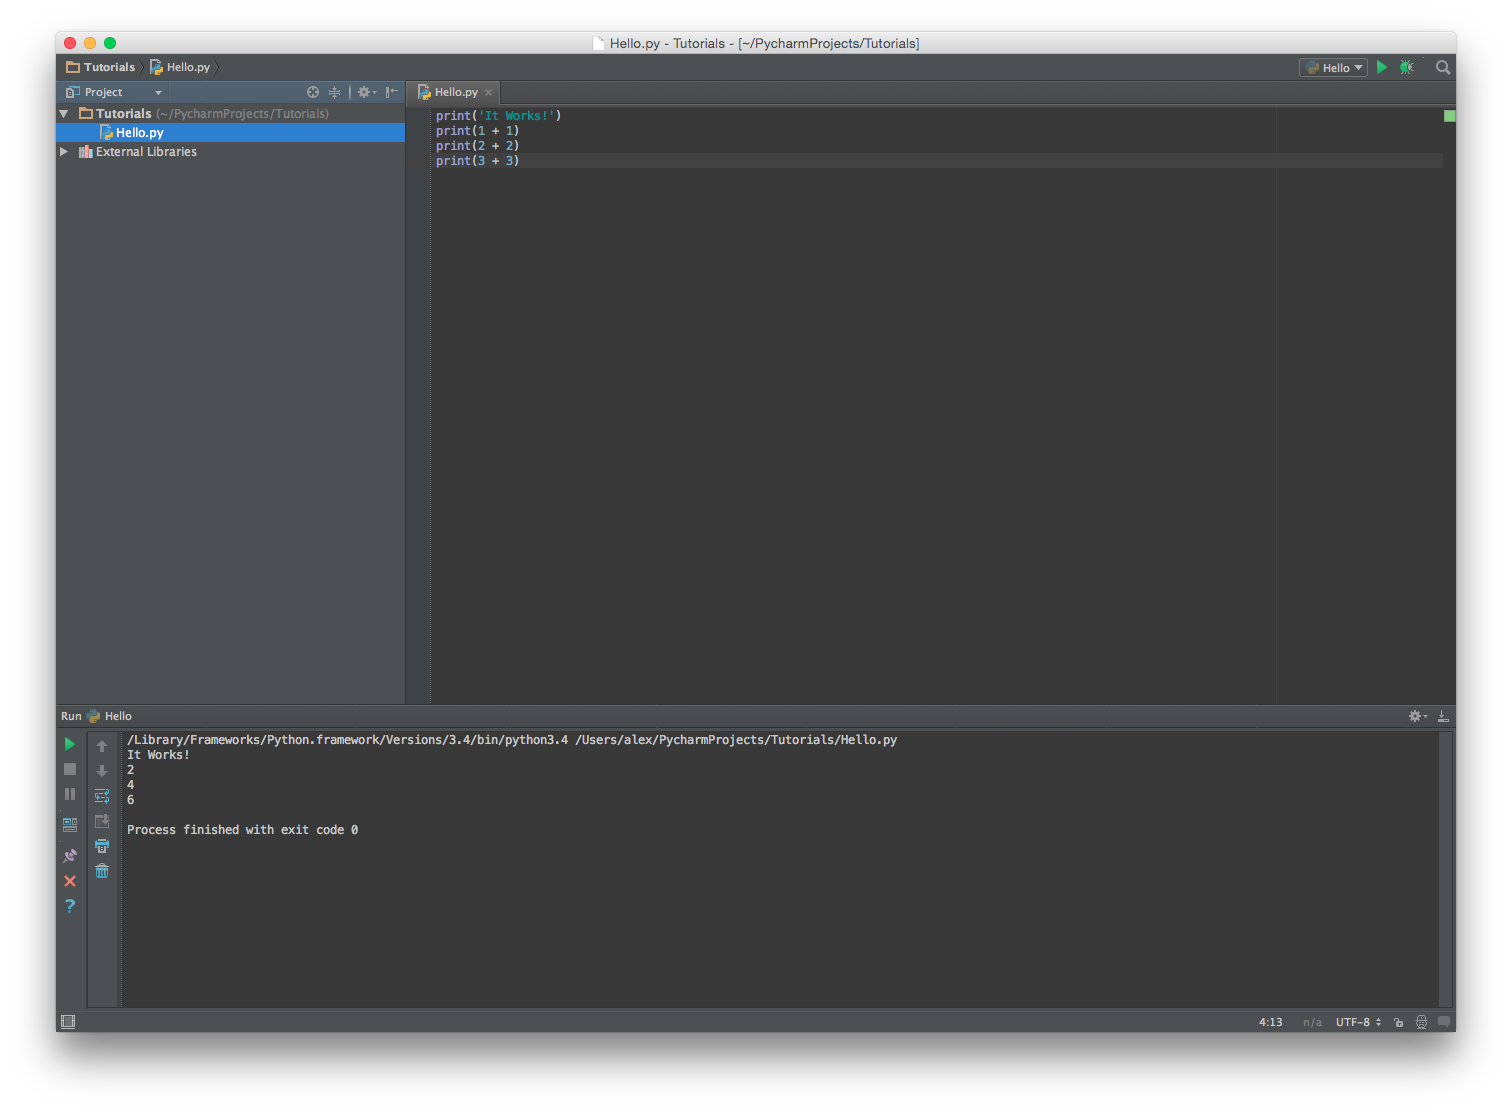
The output from this program should be
It Works!

2

4

6
If you see that somewhere then you know your development environment is working. If you do this on PyCharm then the process will look a little bit like this (note that this was done on OS X and PyCharm was already installed at this point so we don’t go over that):
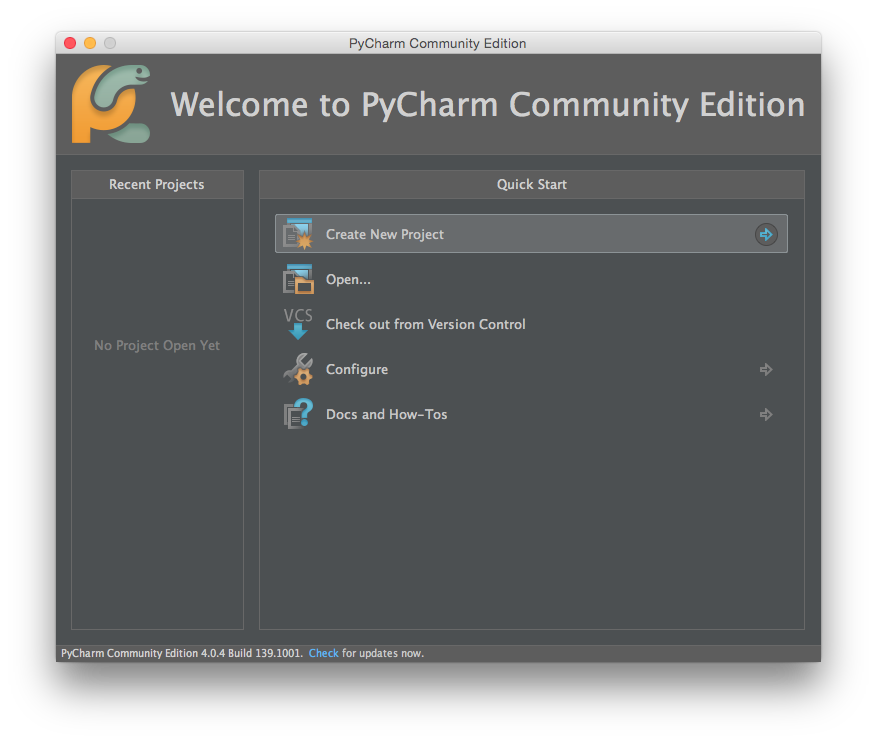
1. Create a New Project
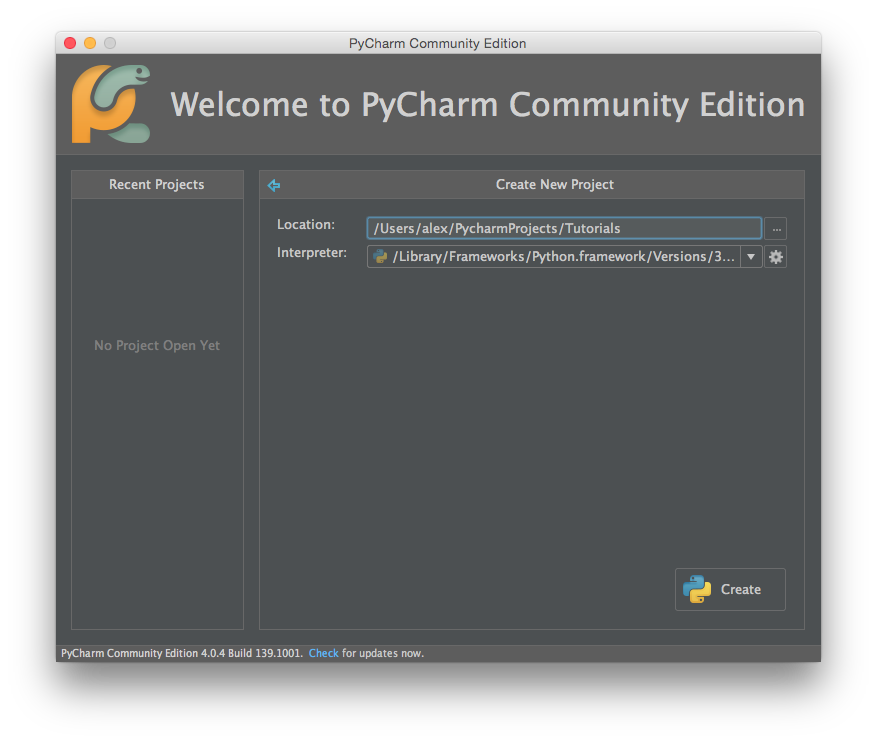
2. Next you want to name your project which will give it a default working folder. I named mine tutorials but feel free to call it whatever you like. No spaces though!
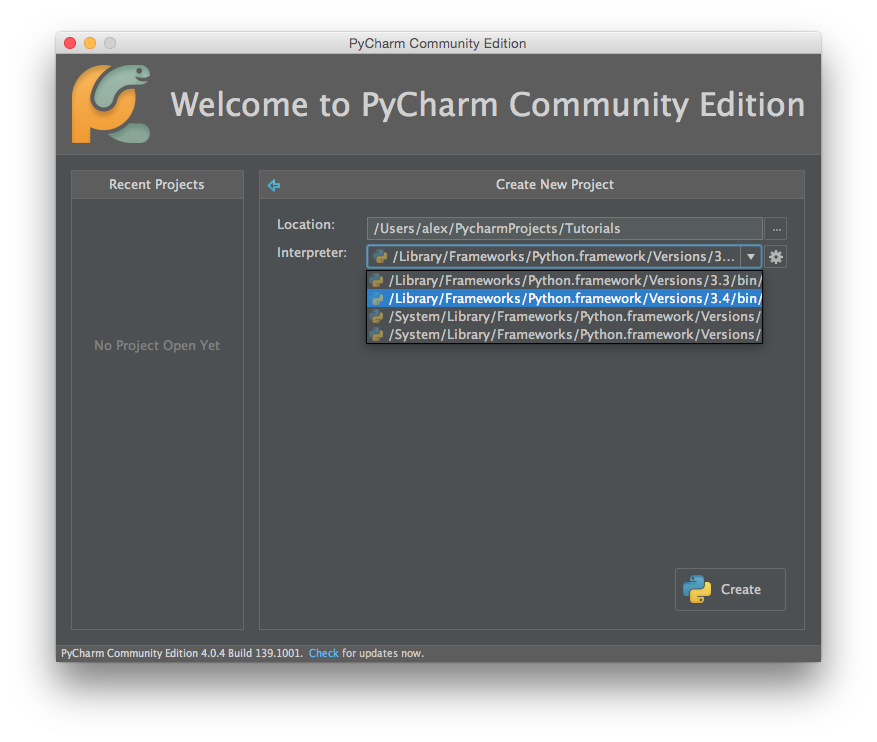
3. We need to make sure we are using Python 3.4 as our Interpreter. This ensures that we are on the newest version which is very important for some methods.
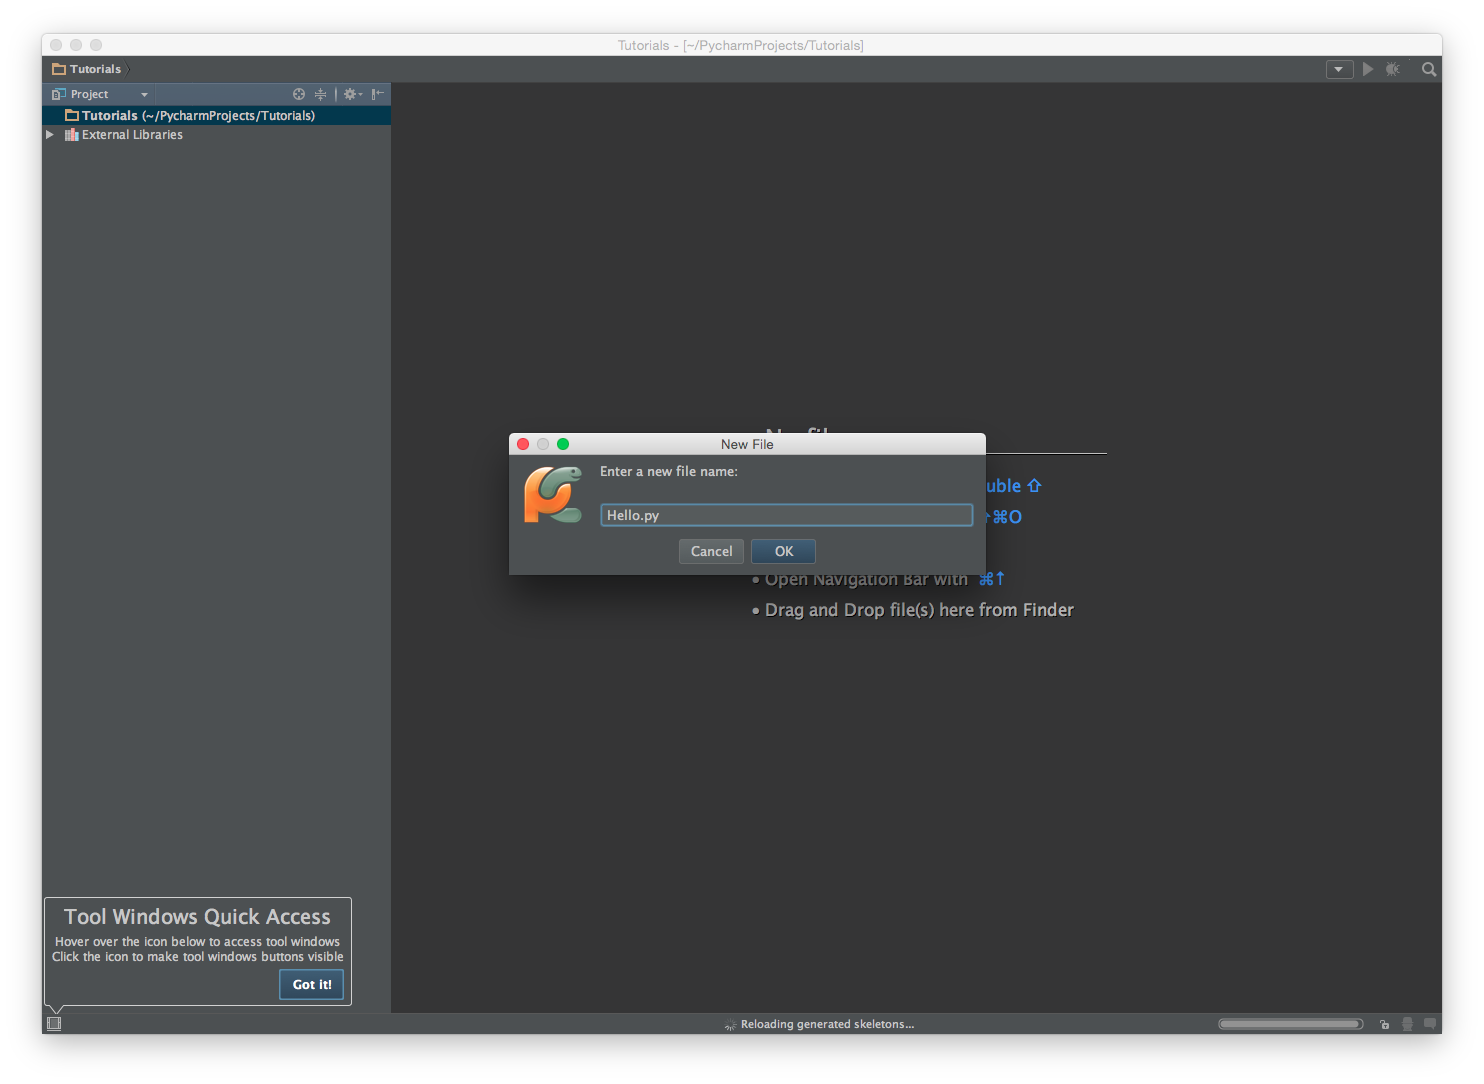
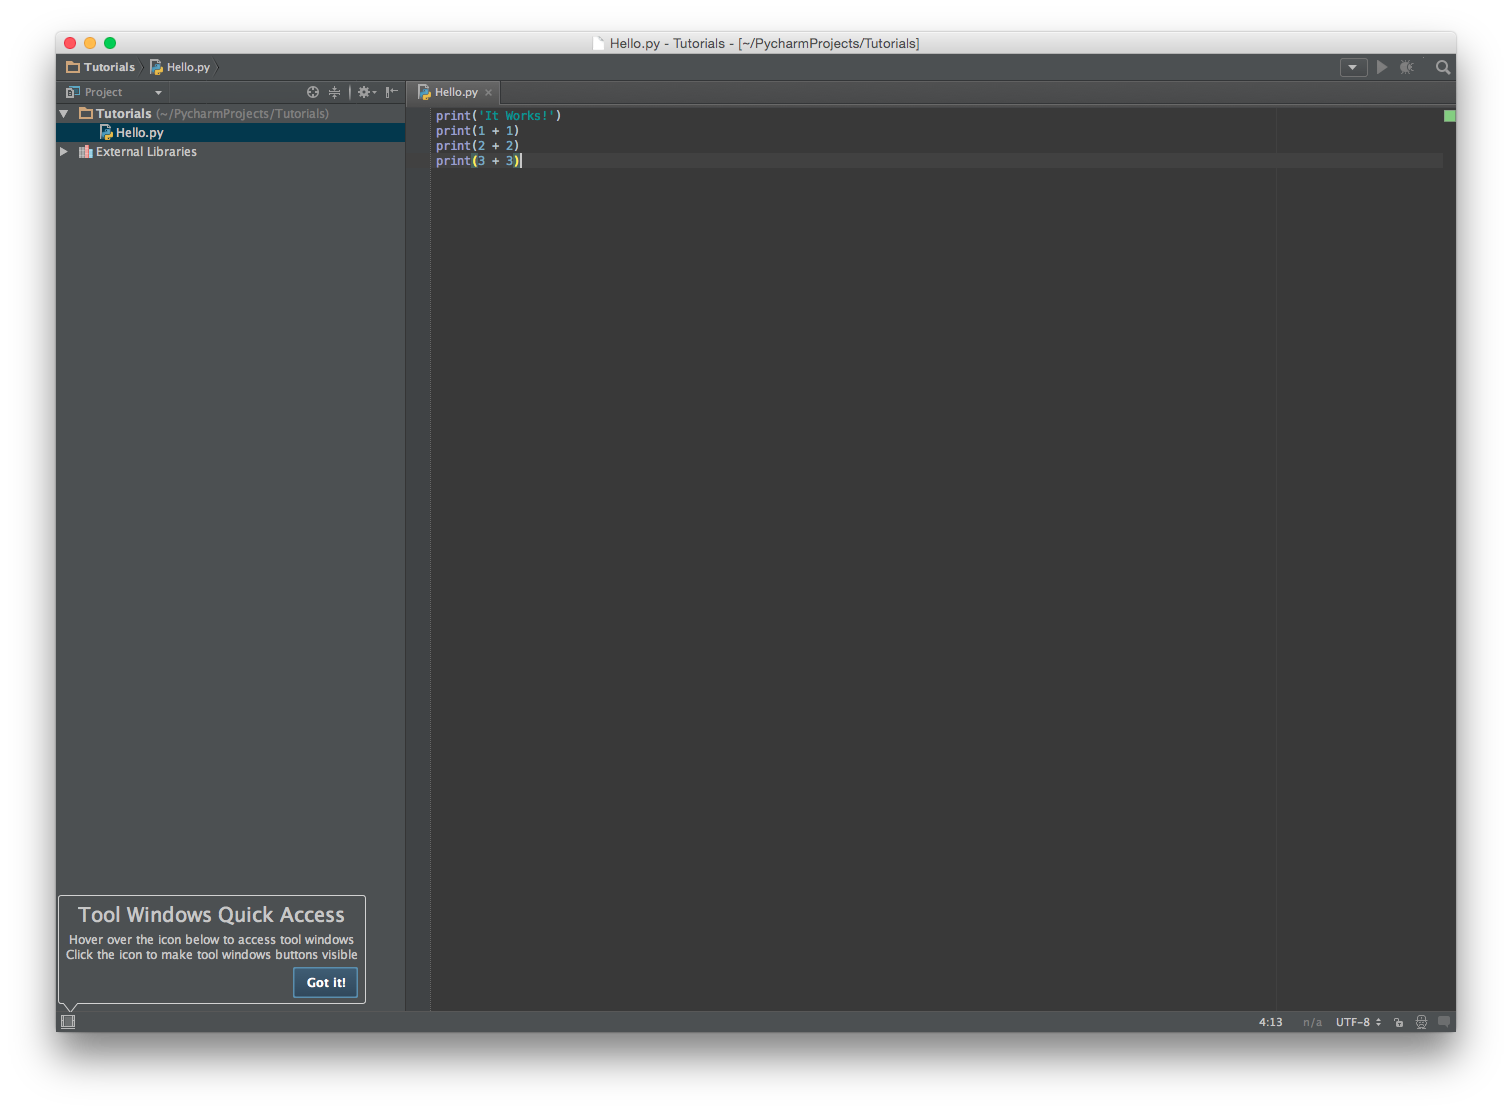
4. After we click “Create” we will find ourselves with a new project window. From here you want to create a new file and call it “Hello.py“. The .py at the end is very important because it tells the computer that this is a Python program and should be run as one. If you forget it then this won’t work. The name can be something other than “Hello” but make sure it doesn’t have any spaces.
5. Next you want to type in your program into the editor.
6. Once you are done typing out the program you can hit Run which is located under the “Run” menu item and then the sub item “Run”. There is also a shortcut for the run located in the top right hand corner of the screen. The program may ask you what you want to Run. If it does this then select Hello.py. When you run the program the output will appear at the bottom of the screen.
Development Environment Organization
All right that’s all the setup for the development environment out of the way. I just want to give a quick note about keeping everything organized. I highly recommend that you create a project called “DobsonDevTutorials” or something like that – and then save all the different programs you do in that project. You can run different files by right clicking on their tab in the editor window and then clicking run. This way you can run all the different programs you want but keep them in their one project folder for reference. Of course this is just a suggestion for how you organize it – it’s really up to you!
User Input and Variables
Finally we will learn something knew in this tutorial. The first thing we are going to learn about is probably the most important thing in all programming languages – variables. Please note that as we work through some of the next section some of the stuff may be a little hazy to you – but I think the example at the end will make everything extremely clear.
Variables are a storage location paired with an associated symbolic name, which contains some known or unknown quantity or information referred to as a value. They function very similarly to mathematical variables such as x – but we can assign different values to them as we move along in a program. The storage location is not as important to us, as that refers to the location in memory that the data is store. I say we should let the computer handle that and not worry about it. What are important are the symbolic name and value.
Take a look at the following example of a variable in action. We will use it as we explain the symbolic name and value.
The symbolic name is the name we give our variable so that we can call on it later and use it. A symbolic name is given to a variable by putting it at the start of a statement followed by a = which will assign a value to that symbolic name. In the above example the symbolic name is fourtyTwo. As another example – in the program we are about to do we are going to ask the user for their name and then print out a customized message. In this case I named my variable name because that’s what the variable is. Naming for variables could be its own tutorial – but just know that you should name them in a way such that its easy for you to read your program and understand what’s going on. Also please note that I will probably start calling symbolic names variable names because that’s just what most people do. So if I ever refer to a variable name then its the symbolic name.
The value part of a variable is the actual data that we want to get from the variable. The value is assigned to a variable’s symbolic name by putting an = between them. It’s important to note that the value of a variable cannot be a method or anything that does a calculation – it is something that has a calculation done to it. Things like Strings and numbers are examples of what we could use as values for a variable. In the above example the value of the variable is the number 42. In the example we will do in a but – the value is going to be the users name.
One very important thing to note about variables is that their value can change over the course of executing the program. Check out the following example:
In this example the variable’s value changes on the 3rd line. We change it from 42 to 69. You can see that shown in the output:
42

69
Alright – now that we know how to make a variable, we just need to figure out how to get user input. Luckily Python makes this extremely easy for us. All you have to do is simply call the input( … ) method with a String describing what you’re asking for. See the example below:
If you run this program you’ll notice that you have to type in your name in the console in order to get it to finish execution. This is because the input( … ) method automatically waits for input from the user. Since that’s the case – make sure you type in your name into the console. On PyCharm this will be the section at the bottom that displays output from your program. Just click in there and starting typing.
After typing in your name, you should get your own personalized message output. Let’s go over the one thing worth noting in this program that may raise some questions. For the print( … ) on line 2 remember that we perform string concatenation with Python by putting a + sign between the two strings. This means that we are printing out “Hello ” followed by the name they typed in. It’s easy but its also easy to get mixed up about if you don’t know a lot about string concatenation.
Pretty awesome and best of all pretty easy! So let’s go one step further. In the next program we are going to ask the user for both their name and their age. We will then use their age to calculate their age in dog years – and then output both their name and age. Below is the program that does this. First I want you to look at the program – and then we will go over some of the tricky parts of it.
The first thing you are likely to notice is the fact that it says int before the input for age. This is because input is by default a string. In the last tutorial I went over math operations with integers and string operations – but I never really went over the fact that those are variable types. Variable types refer to the kind of value store in a variable. For example, we could have a variable with a number stored in it. This means that the variable has an integer type. We could also have a variable that has a string store as its value. This means the variable has string type.
The thing about the types of variables is that methods only can use one type of variable. For example, the input( … ) method only returns a string type – so in order to do math with that we need to convert it to an integer. Luckily there is a int( … ) that does just that for us – so if we use that method on our input( … ) method then we can store an integer in the age variable. This means we can then do math on the age variable.
We actually end up doing the exact same thing in the print( … ) method on line 4 but in reverse. Since we are outputting strings – we need to convert the age variable which has an integer type to a string, so we use the str( … ) method. Variable types are very important to remember because I think a lot of you will get errors that relate to variable types when you just start out programming. Try to keep them in mind and check if you are mixing them up when working on your programs.
Conclusion
I think that’s where we will cut it short today. At the end of each tutorial I want to try to give a programming challenge for you to try on your own to get some practice. Looking at my examples and doing what I do is a good way to get the basics – but solving a problem is the only real way to get better at programming. For this tutorial I want you to try to make a program that takes the users first name and age as two separate variables and then outputs the difference between the users age and the number of letters in their first and last name.
As an example, I am 23 and my name is Alexander (technically!) which has 9 letters so the program would output 23 – 9 = 14. I know this isn’t a very useful program but there is only so much we can do right now since we haven’t learned a lot yet.
In the next tutorial I plan to go over some control flow statements such as if and for. We will also go over lists at that time. Once you have those in your back pocket there will be a lot more you can do both in my examples and in the challenge program(s) at the end.
As always thank you for reading and please share it around as much as you can! Please feel free to put any suggestions or ideas for future tutorials in the comments section below.