![]()
The WordPress Meta Box API allows you to create and add meta boxes to the administrative interface on any kind of post type. This ranges from Posts and Pages to custom post types that you make yourself. If you want to learn how to make custom post types – check out Part I and Part II of my tutorials on custom post types. For this tutorial we will be looking at some custom meta boxes that I added to pages on the new site I’m making. This is our own company website – not a clients so I feel I can share the code without changing any of the names.
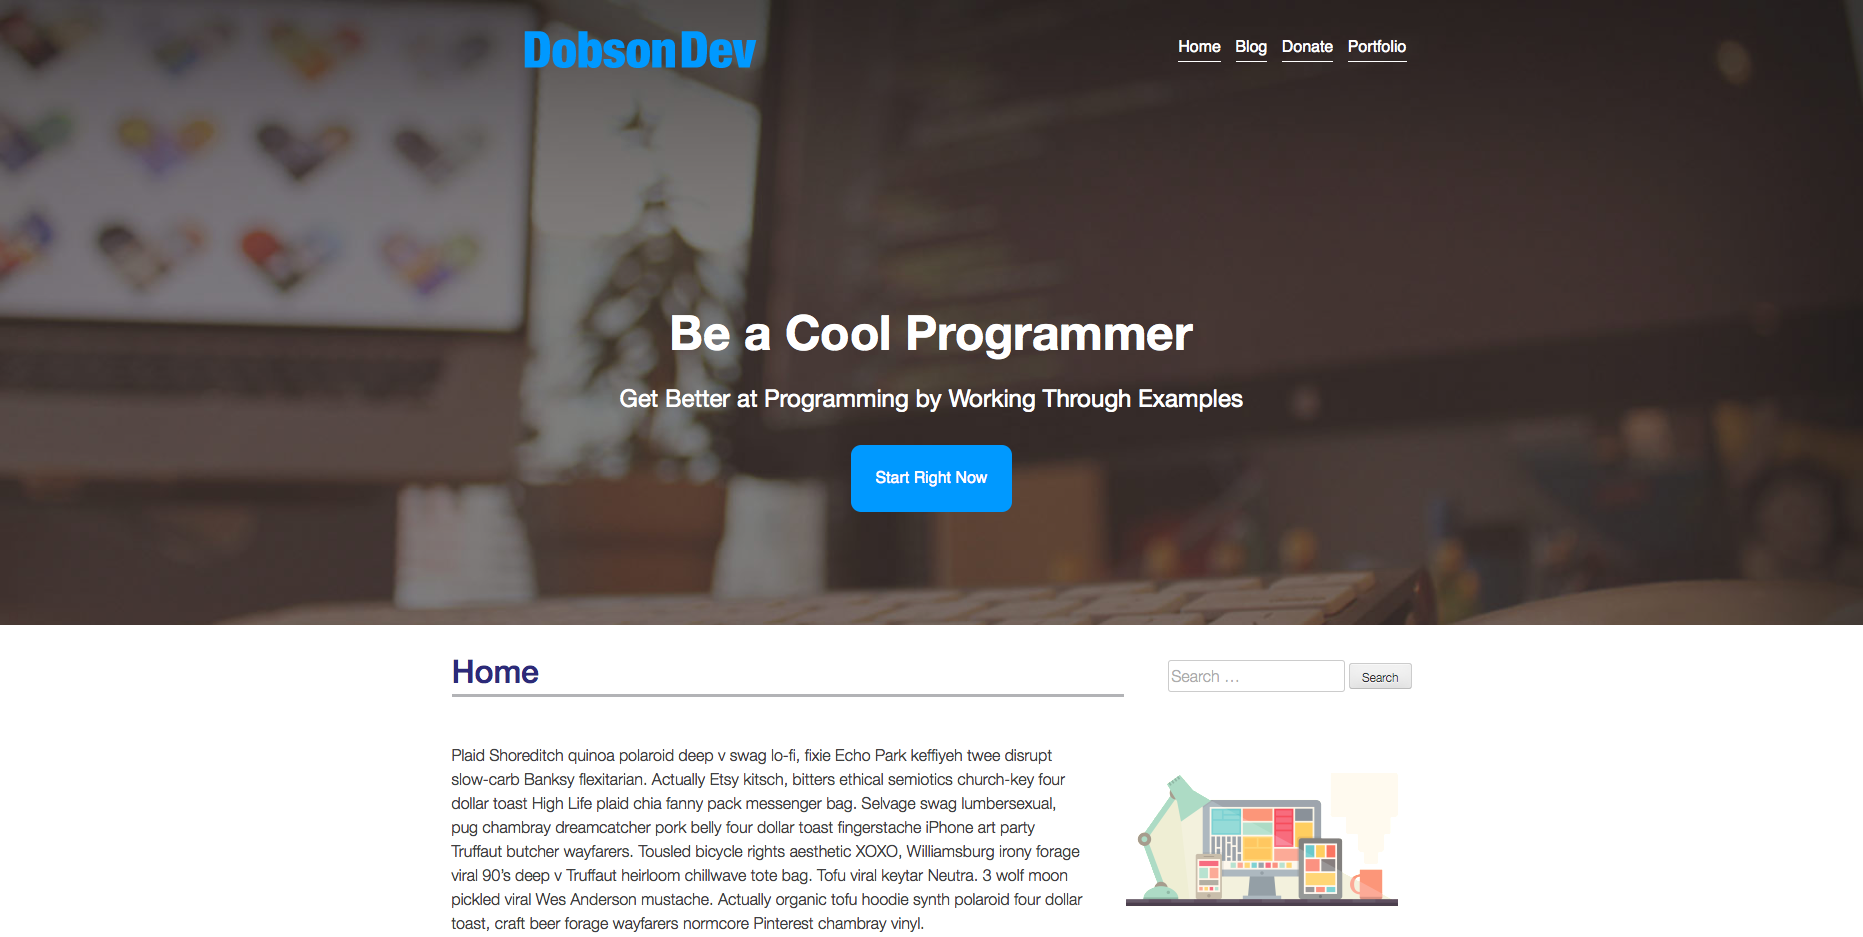
The meta boxes will allow us to set a Primary Slogan, Sub Slogan and a Call to Action on the page that will display in the header. The finished product will look something like this:
Please be aware that since this is production code the code example function names have “veffect” all over the place because they are actually from that theme. Just replace these with whatever your theme/plugin prefix is.
Since this tutorial is using code that comes from a theme – all the code is located in the functions.php file in theme. If you want to put this into a plugin then just move it to main plugin file and it should work – as long as you remember to change the prefixes of everything to that of your plugin! With all of that intro out of the way let’s start taking a look at the code.
Hooking Our Meta Boxes Into WordPress
The first thing we need to do is use the add_meta_box( … ) function to create our new meta boxes. The codex page for the function can be found here. The code to add the three meta boxes can be found below:
As you can see from the comments, we add the ID of the meta box, title, callback function (the function that actually displays the meta box), the post type to display the meta box for, the location on the page to display the meta box and finally the priority of the box to display in order. We hook this into WordPress with the add_meta_boxes hook in the add_action( … ) function call at the bottom. Each of the fields should all be pretty self explanatory – the only thing to be aware is that you have to create the callback function for each – so let’s take a look at creating those now.
Creating the Callback Functions
The callback function for each of the meta boxes will display the form on the admin page when creating or editing a page (since that’s the post type we told them to be added to). The most important thing to remember when making these forms is to include a WordPress nounce. The nonce field is used to validate that the contents of the form request came from the current site and not somewhere else. A nonce does not offer absolute protection, but should protect against most cases. It’s a very simple one line call so make sure you remember it. See the code below for the primary slogan meta box callback function:
As you can see the first method call is to the wp_nonce_field( … ) to create it. After that we simply get the value of our primary slogan. You’ll see we use the _veffect_primary_slogan_meta_key key. This is the first time we’ve defined it so as long as you remember the name you define here and use the same name in the saving function it should work. You can check out the codex page for the get_post_meta( … ) function here to learn more.
After that is some simple output of the form and the current meta box value so that we can see it if its already set. The callback functions are pretty much the same except that the call to action callback function has two values to output. You can see the code for both below:
You might note that I use the same nonce field for each of the meta boxes. I’m honestly not sure if you can use multiple ones but I like to just use one to simplify my saving function – the security given from one field is enough that we don’t need any more I find.
Now that you have this code done – if you should be able to see the meta boxes in your pages admin panel. Mine look like this (the call to action one is a bit cut off but I’m sure you get the idea):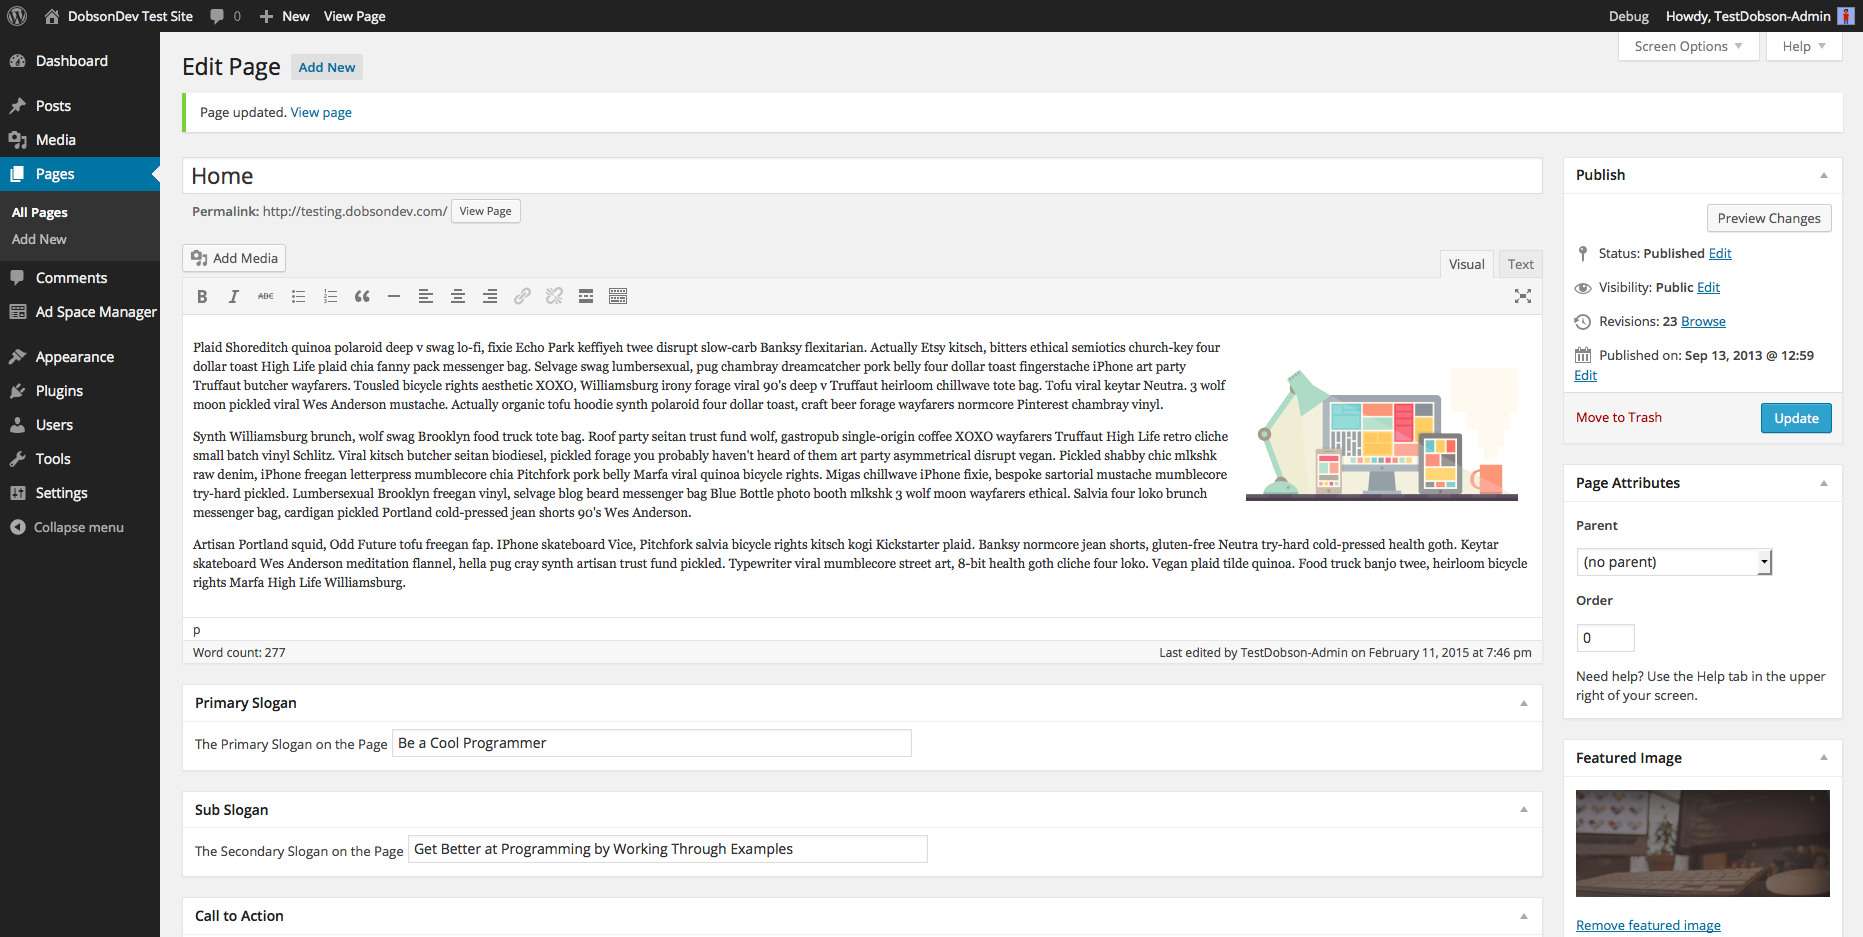
The Saving Function
If you have tried to save your meta boxes you may have noticed something – they in fact don’t save. This is because we haven’t made our saving function. One important thing to note about the saving function is that many people seem to think it needs to be called from the callback functions. This is not the case – the saving function is actually hooked into WordPress so that it triggers every time a post is updated.
Let’s first take a look at the code below and then go over what’s happening:
As you can see – the very first thing we do is check for the nonce field. Simply creating the nonce field without checking it would be pretty useless – so make sure you do that check! After we check to make sure it’s set we check to make sure its valid. This is where the security aspect really comes in – WordPress will cross reference the nonce to ensure it is valid and not expired. If you want to read more about the wp_verify_nonce( … ) function check out the Codex page here.
Next we check to make sure that we aren’t doing an autosave. The reason you want to check this is because it means that we didn’t explicitly set our meta boxes and therefore they might not be what we want right now.
After we’ve check that we need to check to make sure the current user has enough permission to edit the meta boxes. For my example – the user only has to be able to edit the page (after all the meta boxes are a part of the page). If you want you can edit this to be whatever you want. Note that the checks for $_POST[‘post_type’] should be kept in no matter what permissions you require the user to have, just switch the check for page to whatever post type you set your meta boxes to display under.
Now we need to check that all of the meta box values are set. Note that this still means they could be a blank string (ie. you didn’t fill anything in). While this is really a one line check – we have to do it three times for each of the meta boxes. You could of course combine these into a single if statement using the | logical operator if you want.
Following the check that all the meta boxes are set – we grab the data from each, sanitize it and save it. The sanitize_text_field( … ) method is our last line of security against anything sketchy going on. It’s a good idea to include just in case the nonce fails you. Earlier in this article you may recall I said you should remember the key value you gave to your meta box for the value. This is where we use that key again – when saving you call the key. In the examples I looked at the keys usually started with a ‘_’ so I followed suite, but this is not required.
Finally we need to call a few different add_action( … ) methods in order to get everything to work the way we want it to. This actually caused me quite a bit of trouble while working on the theme. As it turns out – the ‘save_post’ hook is only called if there is actually a change to the content of the post. This means that if I changed only the meta box values then it wouldn’t save. The ‘pre_post_update’ hook is what fixes this little bug. I also included the ‘publish_post’ to ensure all my bases were covered.
The HTML
All the code in functions.php is now complete, but for the sake of being thorough I wanted to show the code I have in my header that displays everything. First I retrieve everything using the following code:
This gets all the meta box values. You may also notice that this defines the height of the header. On the website if you don’t have all the meta boxes set then the header reduces in size to make everything look a little nicer. This is just a little feature I implemented but it’s not important to the overall workings of the meta values.
Finally the HTML code snippet to display everything can be found below:
This is a small chunk of the larger header.php template, but it should give you a good idea of the kind of thing you can do. I’m guessing that you will be doing something a little different than what I’ve done so this is just to give you an idea of how to use everything. The end result will give you this:
That’s all there is to it – while it’s not the easiest thing to use in WordPress it’s still relatively simple for the power it provides you as a developer. You can do a lot of cool things using meta boxes, especially when pair with custom posts. I have made a use equipment manager using only custom post types and meta boxes that define the equipments brand, year, etc… There are a lot of possibilities out there for what you could potentially do.
As always thank you for reading and please share it around as much as you can! Please feel free to put any suggestions or ideas for future tutorials in the comments section below.