![]()
I have done a previous tutorial on creating a Local Development Setup Using MAMP. Although using MAMP works well, it has been recommended to me to use Vagrant as my local development environment. Much more experienced developers praise Vagrant, so I decided I would give it a try.
Please note that this tutorial will put a focus on a WordPress development environment since that’s what I work in, but the skills should be transferable to any other type of environment since we go over Vagrant Boxes.
In order to get started you need to download Vagrant and VirtualBox. Once those are downloaded and installed (they have a standard .dmg installer, so there is nothing to the install) you should be ready to get started.
Getting Started
After downloading Vagrant and VirtualBox, open up your Terminal and make a directory in your development folder (assuming you have a development folder, if not create your project folder where ever) called “vagrant-wordpress” (or whatever you want to name it).
After you have your project folder created, you change directories into your project folder and run the command vagrant init. This will create a file called “Vagrantfile“.
If you open up the Vagrantfile you will notice that its written in Ruby and it is full of comments and examples. You don’t have to have any knowledge of Ruby to figure out what’s happening in the file. You should probably give these a quick read over to get an idea of what kind of settings can be set for your vagrant machine.
Before we dive into changing the settings in our Vagrantfile, we will discuss what vagrant boxes are and then take a look at the different available boxes that will meet our needs.
Vagrant Boxes
Directly from the Vagrant Docs tutorial on Boxes:
Instead of building a virtual machine from scratch, which would be a slow and tedious process, Vagrant uses a base image to quickly clone a virtual machine. These base images are known as boxes in Vagrant, and specifying the box to use for your Vagrant environment is always the first step after creating a new Vagrantfile.
You can think of vagrant boxes exactly like going to a store and buying a machine. Instead of going to a physical store though, we will visit the Vagrant Cloud which contains all the different boxes available.
After doing a quick search for “WordPress” on the Vagrant Cloud I quickly found the top rated box called “avenuefactory/wordpress”. This one seemed to have everything I wanted in a development environment as well as more extensive documentation compared to some of the other boxes.
I highly recommend you go to the avenuefactory/wordpress page and read over the information contained there. It gives an idea of what the box can do as well as the instructions to setup the Vagrantfile correctly (don’t worry, I’ll still give a step by step of how to setup your Vagrantfile).
In order to download this box and add it to your vagrant setup, run the command:
This will download the box so that you can use it in later vagrant projects without having to download it over and over again. Note that once you have downloaded the box, on future projects you can run the command:
This will automatically setup a WordPress 4.0 installation with a database connection already made. You will still have to mess around with the Vagrantfile a little bit to setup the right private network IP address and synced folder (more on these in a bit), but it still takes out a little bit of work.
Modifying Your Vagrantfile
Now that we have found the box we want, we have to modify our vagrant file to use that box and do a little more setup work. To start, open up your Vagrantfile with Sublime Text (if you’ve never used Sublime Text before, you should start because it’s probably the best text editor you will find) and find the line that reads:
# config.vm.network “private_network”, ip: “192.168.33.10”
We want to add the following beneath that line:
config.vm.network :private_network, ip: “192.168.10.10”
This will set our box to the private network IP address specified, in this case “192.168.10.10”. You can of course set it to whatever you like.
Next you want to find the line that reads:
# config.vm.synced_folder “../data”, “/vagrant_data”
We then want to add this line underneath it:
config.vm.synced_folder “wp-content”, “/var/www/html/wp-content”
This will set your synced folder to be the local wp-content folder located in your project folder. Finally you will want to make that folder by running the following on the command line:
Note that you don’t technically have to put these lines underneath the commented out lines (in Ruby, a # denotes a single line comment), I just recommend doing that to keep your code organized and so you can read the comments to figure out what each command is doing. I like leaving the original lines there, but you definitely don’t have to if you don’t want to.
Now that all of our setup is done, we will look at actually running our virtual machine.
Running the Virtual Machine
Running our virtual machine is as simple as calling a vagrant command. Type the following into your terminal and your box should boot up:
The boot process should look something like this:
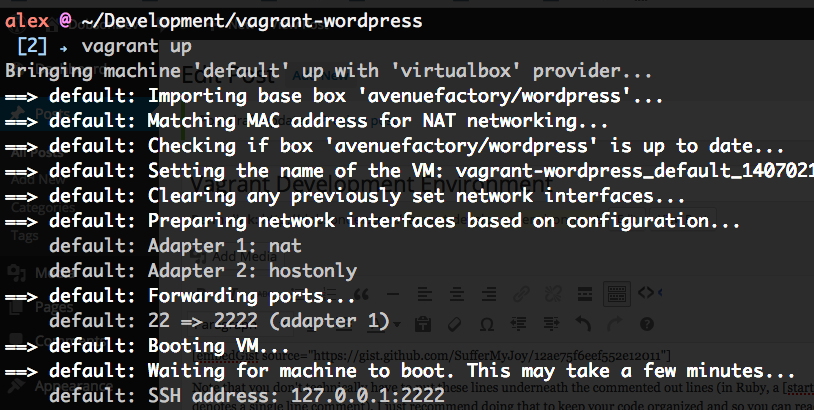
Right at the end of the boot process, you should see a line that reads “default: /var/www/html/wp-content => /Users/alex/Development/vagrant-wordpress/wp-content“. This will let you know that the change to your synced folder in your Vagrantfile has worked.
The easiest way to check that everything is running is to SSH into your new box. You can do this by running the following vagrant command in your terminal:
If this brings you to into your machine, then congrats, everything is working! You can also easily check if its working by going to your phpMyAdmin page located at http://192.168.10.10/phpmyadmin/.
If you are having trouble booting and get the message like “default: Warning: Connection timeout. Retrying…” (this happened to me), use the second solution on this Stack Overflow Solution. It worked for me so hopefully it will also work for you! The reason this happens is if you improperly shut down your machine the first time, I tried a few different boxes and such while making this tutorial so one of them must have been shut down improperly. A quote of the solution can be found below:
I solved this problem, and will answer incase anyone else has similar issue.
What I did was enabled the GUI of Virtual box, to see that it was waiting for input on startup to select whether I wanted to boot direct to ubuntu or safemode etc.
To turn on the GUI put this in your vagrant config:
– via StackOverflow
Once the GUI launches you can just launch whatever VM you want in Virtual Machine and then everything with Vagrant should boot up.
WordPress Install
If you navigate to http://192.168.10.10/ then you will quickly see that it will take you to the WordPress installation page (also a good sign that everything is working. Note that because of the box we used, we don’t have to setup any of the WordPress core, it has already been setup for us.
Fill out the information on the installation page just like you would a normal WordPress installation.
Next we will check to make sure our synced folder is working. First, you want to change directories into the wp-content directory and create a folder called plugins just like on a normal WordPress install.
Next put your favorite plugin in that folder. I put my DobsonDev Shortcodes Plugin into the folder (again, just like you would on your regular WordPress install). Now, if you navigate to the plugins section on your admin side (http://192.168.10.10/wp-admin/plugins.php) you will notice that the plugin is there and ready to be activated.
You can do the exact same thing with a themes folder. Create a folder called themes in your local wp-contents folder and then put your favorite theme into it. It will then appear on your WordPress back-end (http://192.168.10.10/wp-admin/themes.php).
The final thing to go over is the database credentials for working on your plugins/themes.
Database Credentials
The login credentials for your phpMyAdmin page will be “root” with password “root”. Once inside, you will notice that your WordPress install is using the database “wordpress”.
If you want to do any database operations while working, you can use the credentials username = “root” and password = “root”. That’s pretty much all there is to know about the database.
You’re Done!
Congratulations, if you’ve made it this far then you have a fully functional vagrant local development environment working on your computer perfect for WordPress. If you are looking to do something other than a WordPress install, just check out the Vagrant Cloud for a box that suites your needs. If you then follow the same basic steps as this tutorial, you should be good to go!
In case you wanted to simply copy paste, my final Vagrantfile looked like this:
If you have any more questions, vagrant has extensive documentation that will probably answer any question you may have.
To stop your box you can run vagrant halt to shut it down forcefully, or you can run vagrant suspend to simply suspend the virtual machine. In either case, to restart it again, simply run vagrant up.
If you’re done with the machine and you want to permanently get rid of it, run vagrant destroy on your host machine, and vagrant will remove all traces of the virtual machine.
While writing this tutorial, I realized one very simple fact about Vagrant, it’s damn easy to use. I never used it before but I had a really good development environment up in no time. There was no writing build scripts or any of that nonsense, so I’m starting to understand why developers are using it so much.
There is still a lot I want to learn about Vagrant, so there will probably be some follow up tutorials on tips, tricks, and other things like that in the near future. I especially want to look into things like reproducing the same environment with only a single command.
I also wanted to mention that some of my friends who read my blog have suggested that I do some very basic programming tutorials in the near future. These would most likely be on using a very basic programming language such as Python or maybe Java for the absolute beginner. These will obviously be different in skill level from the tutorials I’ve been writing, but I think it’s something I want to try out – so keep an eye out for those!
As always thank you for reading and please share it around as much as you can! Please feel free to put any suggestions or ideas for future tutorials in the comments section below.