
Being able to open up your projects via the Terminal or by right-clicking is a great feature that should be included with every text editor. Unfortunately, these features are often not included. Atom is the new editor on the block right now, so I figured I would make a tutorial similar to my Extending Sublime Text tutorial but for Atom. Atom is being developed by GitHub and is currently in beta. Atom’s getting started page says there is a command line launcher, but it didn’t work right out of the box for me so I just made my own.
Let’s add the command line launching option first. Open your Terminal App of choice (I personally use iTerm2 because of some of its advanced customization features but the native terminal app works really well too). Once open you will want to open up your .bash_profile by using the following command:
Next you will want to add the following line (copy it then paste it into nano using Command+V). I have this line as the very first line in my .bash_profile:
You will now want to save the changes you made to your .bash_profile. You can do this (assuming you used nano) by hitting Control+O (thats the letter O not the number 0) to write out the file, hit Enter when it asks for the “File Name to Write: .bash_profile” since we definitely want to keep that name, and then hit Control+X to exit.
This will add your .bashrc file to your .bash_profile file. This is needed because we need to use parameters to our function, so simply creating an alias in this case will not work (like we did in the Extending Sublime Text Tutorial).
Next you will want to open up your .bashrc file by entering the following command:
Now you will want to create the function for atom. You can use the following lines to do that:
This basically opens the argument passed in Atom, and does not display any extra text and runs in the background. This keeps your command line free so you can continue to use it. When you simply try to make an alias, the command line becomes occupied like its running an application.
And that’s all there is to it! Once you have done that you can open any folder or file in the terminal with Atom. Give it a try by opening up your documents folder:
Alright now that we have the command line working, lets get the GUI world working. Our plan is to add the same command we just added to our .bash_profile to Automator and have it work by right clicking a folder or file. To start off, open up Automator (a native app that comes with OS X). Tell Automator that you want to create a New Document, and that you want it to be a service.
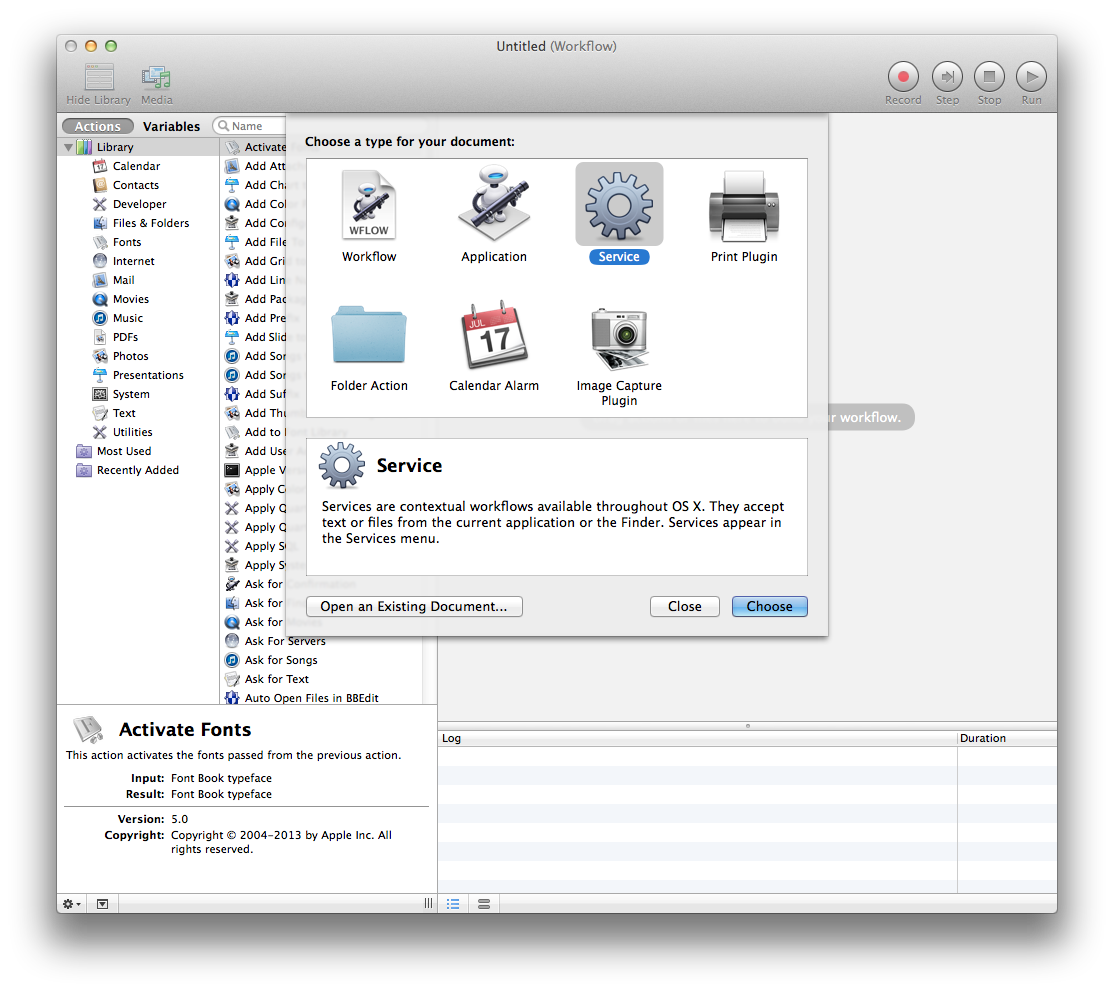
You want to tell Automator that you want to run a shell script, so in the search box type “run” and the action “Run Shell Script” will appear.
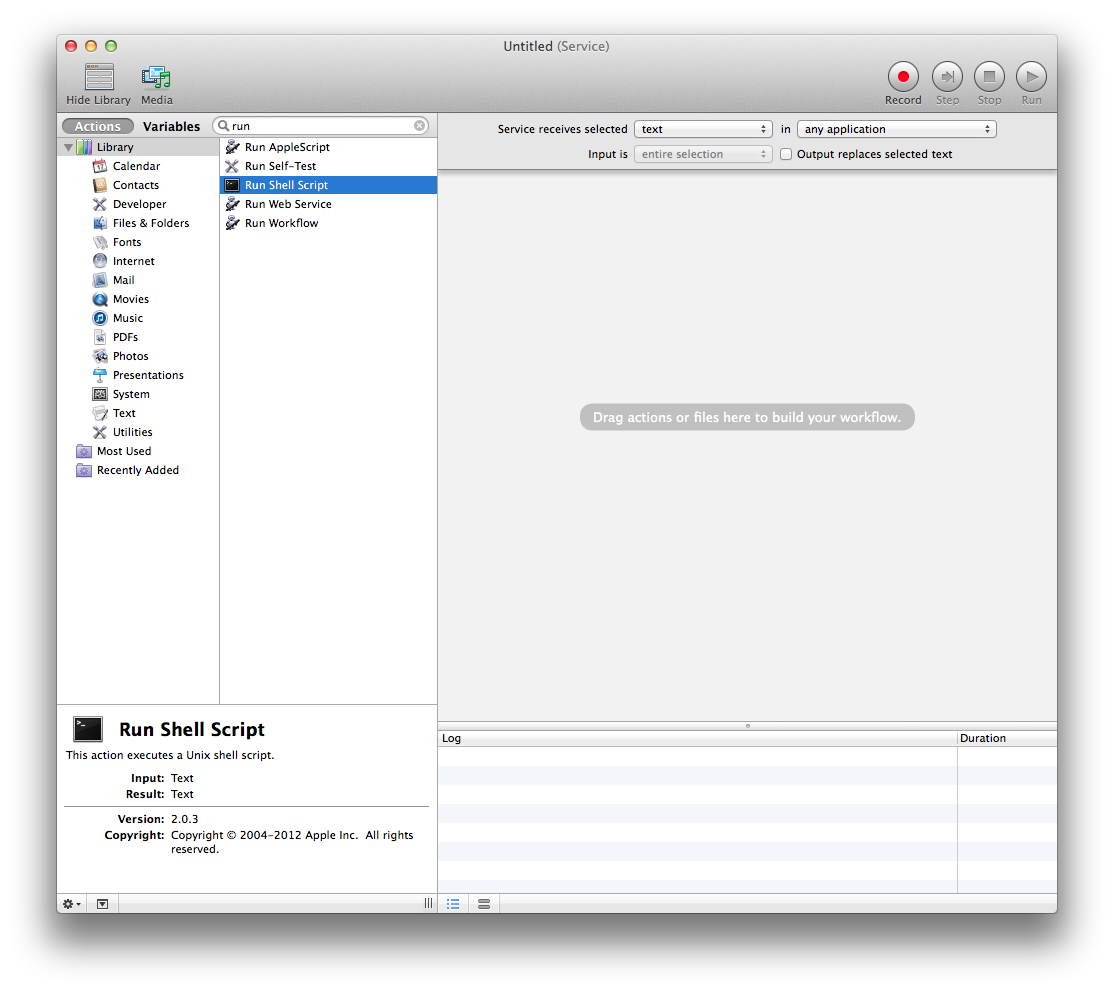
Next you will want to drag “Run Shell Script” to the right hand side. This will expand it so you can type in what you want it to run.
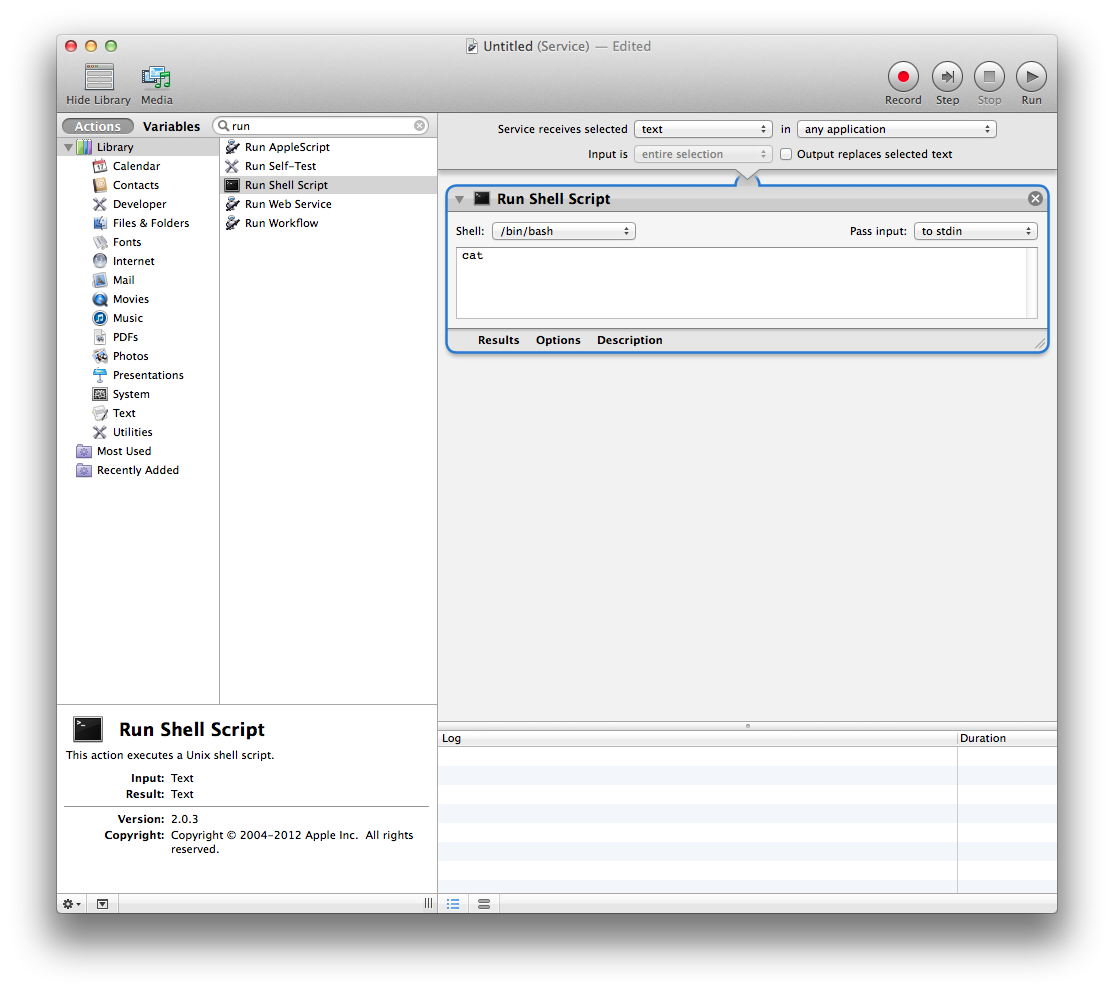
Next you will want to paste in the follow command:
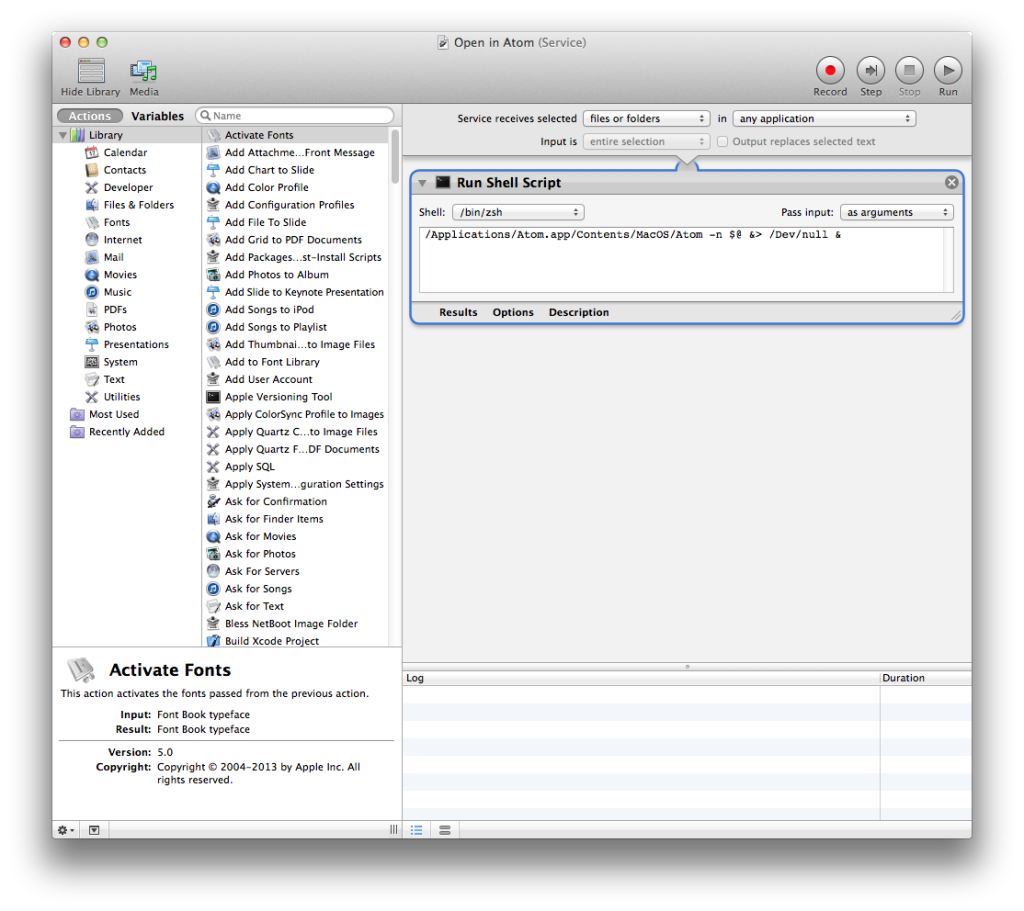
Once that is done we only need to change a few more things for this service to function. First, change the “Shell” option to “bin/zsh”. This option is located in the top left hand corner of the Run Shell Script action box.
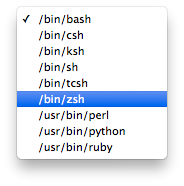
Once that is done, you will want to change the “Pass input” option to “as arguments”. This field is located in the top right hand corner of the Run Shell Script action box directly across from the “Shell” option you just changed.
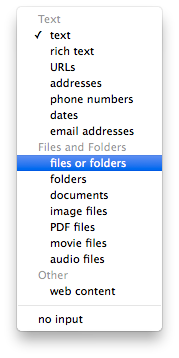
Finally, you want to change the “Service receives selected” option to “files or folders”. This option is located at the top of the Automator window, slightly to the right. It should be directly above your Run Shell Script action box.
The final Automator service will look like the following, so if you have it matched up it should work perfectly:
Save the service and name it whatever you want. I named mine “Open with Atom”. You need to save the file to the “/your-user-name/Library/Services/” folder, but Automator should have that setup automatically for you. If it doesn’t then that is the folder you need to navigate to.
Once its saved you should be able to right click on a folder and at the bottom it should say “Open with Atom” (or whatever you name your service). That’s all there is to it! We have now added two great features to extend Atom’s capabilities.
As always thank you for reading and please share it around as much as you can! Please feel free to put any questions, suggestions, or ideas in the comments section below. You can also email me directly via alex@dobsondev.com to get an Atom beta invite. I have 3 to give away on a first-come first-server basis.