“The PHP Framework For Web Artisans” is quite a bold statement to make, but Laravel might just accomplish it’s goal of being the best PHP framework out there. Laravel is extremely powerful when it comes to making online applications and honestly it’s not that hard to use either. If you’ve ever used Ruby then you would feel right at home with Laravel.
Some of you reading the title may be wondering why I’m bothering how to go through and setup Laravel on Scotch Box, after all Laravel has it’s own official Vagrant box called Homestead. The main reason is simply because I don’t want to mess around with two Vagrant Boxes – I would rather just use one box that I’m super familiar with so that I know all the ins and outs of it.
I am first and foremost (because I get paid to do it) a WordPress developer. The Scotch Box is great for WordPress development (I already have a blog post for how to setup the Scotch Box for WordPress development) but it also has Laravel built into it, so that’s what I choose to use so I can use the same box for both. This way I know the layout of the file system and how everything works no matter what I’m working on.
To play my own devil’s advocate; lots of the “power” of Vagrant comes from the fact you can use multiple boxes for different situations. You can have one box specifically designed for WordPress that requires no setup, then another for Laravel, and another for Ruby on Rails. If that’s what you choose to do there’s detailed instructions on the Laravel site for setting everything up with Homestead and I will totally understand you’re point of view.
If you’re still with me, let’s get started.
Vagrant Up
Before you can get started with any of that you have to install Vagrant itself as well as Virtual Box (or some equivalent that works with Vagrant, but Virtual Box is the most supported so I would go with it). Both of these are a simple download and then install from the downloaded file – there’s no technical trickery required.
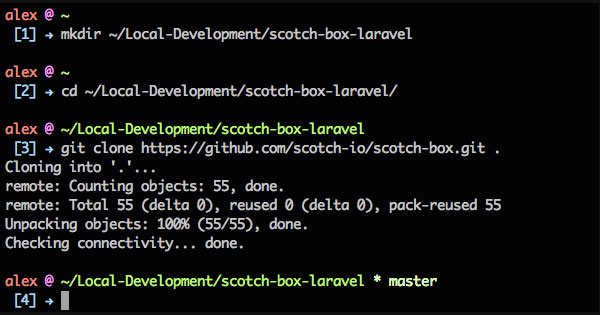
The first thing you will want to do is create a folder for your project. Vagrant uses a “folder for each project” type of structure, so the first thing you’ll want to do is create a folder for your project. Check out the terminal command below but feel free to your project anywhere you like:
Next we need to get the actual Scotch Box box. The preferred method for getting the box presented on the Scotch Box website is to use Git to clone it. This will setup a Git repo inside of our folder as well which is excellent because we want to be using version control anyway. To clone the repository run the following command:
The terminal output for all these commands should look something like this:

Just a note, if you like my terminal you can find an entire article I did on the Customizing Your Terminal which contains the aesthetic changes I made to iTerm as well as a copy of my .bash_profile file. If you are interested in that then please feel free to check that out.
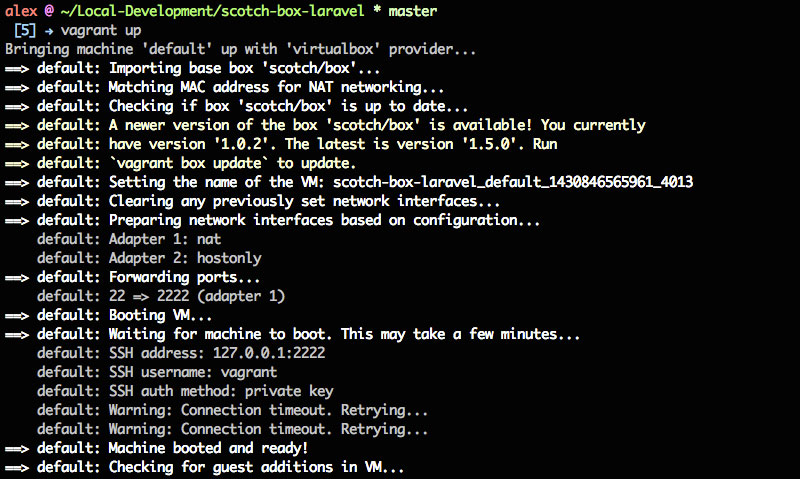
We’ve only really done two very simple command line operations but we’re already ready to get our virtual machine up and running. We can now execute the mighty vagrant up command:

There’s a few more lines at the bottom but you get the idea. If you have a problem where you keep getting Connection timeout. Retrying… over and over for a long time, check this Stack Overflow Question for a possible solution. Once you’re machine is booted up and ready though you should be able to access it at http://192.168.33.10/. If you see the splash page – congrats you have Scotch Box up and running!
Laravel Up
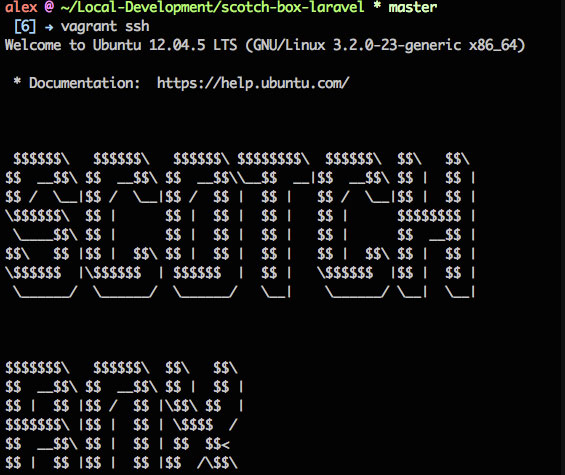
Getting Laravel working on our new box takes a few steps but it’s not incredibly difficult. There is just a little setup to do on the server side and a couple of things to change in the configuration file. To get started get into your box by running vargrant ssh:

Once you’re in, we need to add Composer to the $PATH so we can run it easily from anywhere. Run the following command to add it to the $PATH (you can of course run Composer commands from where it’s located, but since this is just a single command it’s really worth it to do):
Once that’s done navigate to the /var/www/ directory. You will notice that this is where you’re public folder and Vagrantfile are located. Once you are in that folder run the laravel new command with a project name and you’ll be set up. The commands are listed below to change directories and then create a new Laravel project:

The next thing we have to do is remove the current public folder and then move the public folder from inside the Laravel app the /var/www/ directory. You can do that with the following commands (make sure you are in the /var/www/ directory when running these):
Once you have that done open up the index.php in the public directory and change line 21 from require __DIR__.’../../bootstrap/autoload.php’; to require ‘../laravel-app/bootstrap/autoload.php’; and line 35 from $app = require_once __DIR__.’../../bootstrap/app.php’; to $app = require_once ‘../laravel-app/bootstrap/app.php’;. An updated version of index.php with the correct file paths can be found below:
Conclusion
That’s it – once the changes have been made to index.php you should be able to visit http://192.168.33.10/ and see the splash page for Laravel. Needless to say if you saw how we setup the file paths you should know that this isn’t the only configuration you could use – you’re app could actually go almost anywhere and then you just point to it. I just like keeping in where I can easily access it through my local file system. In the future I would love to cover more stuff about Laravel so look out for some tutorials/articles about that.
As always thank you for reading and please share it around as much as you can! Please feel free to put any suggestions or ideas for future tutorials in the comments section below.