
As many of you already know, Sublime Text will change the way you work. Every web developer I know uses Sublime Text as their primary text editor these days, and there is good reason for that:
- It has the fastest Project Navigation I’ve ever seen
- Its Multiple Selection tools are super advanced and easy to use
- Its available for OS X, Linux and Windows
- It has a badass Distraction Free Writing mode
- Its Split Editing allows you to edit with as many rows and columns as you wish
- Every aspect of the editor is customizable
- Its Plugin API is like no other. There is a plugin for almost anything you could ever want.
Essentially everything Sublime Text does will enable you to work faster and get more done. Its super customizable and you can make it into the perfect text editor for your specific needs. If you haven’t already, go download it right now.
As developers work they often reuse code segments over and over. Everyone knows how annoying it is to type the entire jQuery function for WordPress on every template you have to make:
Luckily Sublime Text provides customizable Snippets of code which allows you to quickly insert pieces of code you use all the time. Lets see how to make a Snippet for the above jQuery script, since it gets used all the time when working with WordPress. First, open up Sublime Text and under Tools select New Snippet.
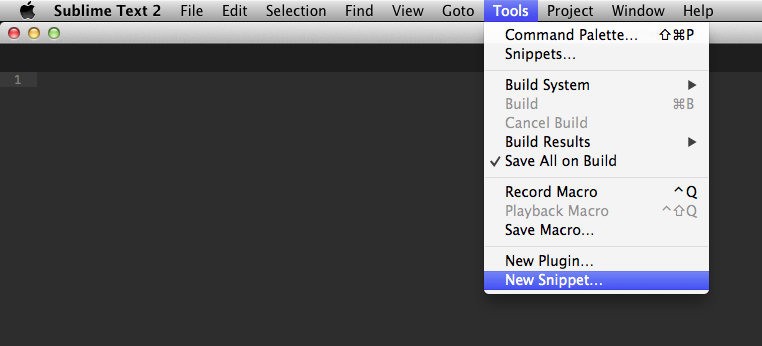
This will give you a piece of code that looks like this:
This is the default Snippet layout for Sublime Text. We now want to replace the content with our jQuery script template (also make sure you remember to use an escape character for the function($)):
Now we can add a location for our cursor by adding the following:
When we create this Snippet now, our cursor will automatically appear at the location of “//Code Here” and it will be highlighted. This will allow us to start typing our JavaScript immediately. If you want to be able to tab between locations, you just increment the numbers on the cursor location. For example, {2://More Code Here} would provide a second location that you can tab to.
Next we need to do is set our Tab Trigger. When we start typing the Tab Trigger in Sublime Text, we can hit tab which then then make the Snippet appear. We can setup the Tab Trigger by uncommenting the <tabTrigger> section of our snippet and adding the trigger word:
As you can see, I have chosen to use “jquery” as my Tab Trigger, but you can use <script> or whatever you like. I just find jQuery is easy to remember and since I primarily work on WordPress sites, I don’t need that to be reserved for a different snippet. The last step we have to do is set the scope of the Snippet. Uncomment the <scope> section of the Snippet and then add in the scopes you want to use, in this case I will just use source.php since I almost always work in WordPress.
The Snippet is now complete. All that’s left to do is save it to the proper location. That location is Packages/User folder. I suggest making a Folder for each different language and save Snippets for each language in their specific folder.
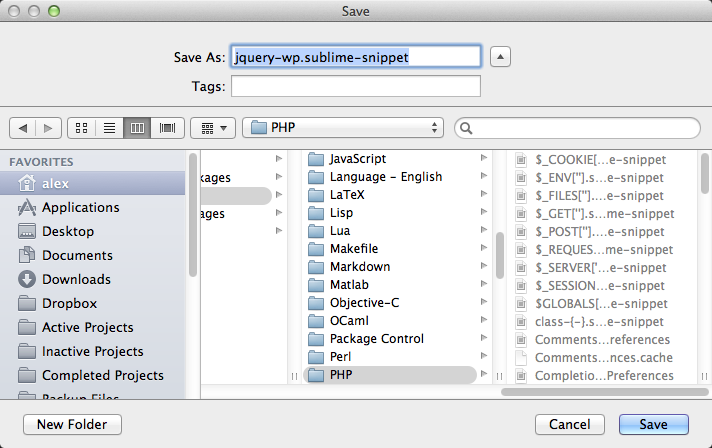
Also note that the extension has to be .sublime-snippet. If you use any other extension then it won’t work and you’ll be a sad panda.
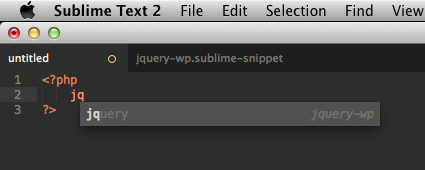
That’s all there is to creating your snippet, now if create a new project and switch the view to PHP (you can do this quickly by typing Command-N for the new file, and then hit Command-Shift-P to open the Command Palette and type PHP and there should be an option that reads “Set Syntax: PHP” and just hit enter on that). Then when you start to type jquery a pop up will appear like this (this has to be in PHP tags or it won’t work, Sublime Text knows these things):
Then all you need to do is hit Tab and then your Snippet will magically appear:
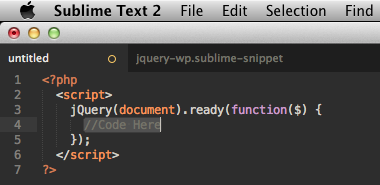
And that’s all you need to know to get you started making Snippets using Sublime Text. I feel that pretty much anything you type for each project should be made into a Snippet. There are lots of already made Snippets that you can go out and find as well.
If you are looking for more Tutorials involving Sublime Text, you can’t do better than This Tuts+ Tutorial by Jeffrey Way.
I also thought I would share my Sublime Text preferences with you all. There are as follows:
You can download the Theme I use here: https://github.com/kkga/spacegray.
As always thank you for reading and please share it around as much as you can! Please feel free to put any questions, suggestions, or ideas in the comments section below.