Creating your own customized WordPress user role is simple to do and gives you the power to define exactly what a user will do on your site. For example, we give our clients access to almost everything except the ability to update plugins and core. We prefer to do this ourselves to ensure we have the proper testing done so nothing will break.

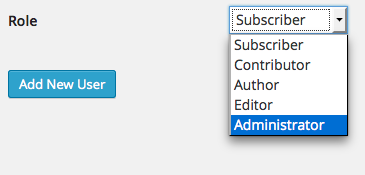
Before we look at creating a custom role, let’s first examine the different roles built into WordPress. These are “Subscriber”, “Contributor”, “Author”, “Editor”, and “Administrator”. Chances are one of these roles will actually fit the criteria you need. A brief summary of what each role does can be found below:
- Administrator – somebody who has access to all the administration features within a single site.
- Editor – somebody who can publish and manage posts including the posts of other users.
- Author – somebody who can publish and manage their own posts.
- Contributor – somebody who can write and manage their own posts but cannot publish them.
- Subscriber – somebody who can only manage their profile.
//via WordPress Codex
As you can see, these predefined roles will most likely fit the situation you require. If you want to check out a more detailed explanation of what each role can do, check out the WordPress Codex page on Roles and Capabilities. It has exactly what each role can do.
If you still want to create your own custom role – there is a built in function that can do that. We will be looking at the WordPress function add_role( … ) (Codex Page). This function allows us to define our own user role. To start, you will want to figure out where you want to define the role. I recommend doing it through a plugin. If you’ve never made your own WordPress plugin before, check out my tutorial on how to Create Your Own WordPress Plugin. It goes through the basic steps needed to create the plugin.
The other option is to just add the code to your functions.php file in the theme you are using (you should use a child theme for this unless you are developing your own theme). For the rest of the tutorial I will assume you are making a plugin – but if you decide to use the functions.php method you simply need to move the code and change the hook.
The next step is to actually form the code. If you are using the plugin approach then you will want to create a function that is called during the register_activation_hook. This means the function will be run when the plugin is activated. To do this you use the following:
This will lay the groundwork for the code to follow. Now we will insert the add_role( … ) code:
In the above code, you will see that the add_role( … ) takes in 3 parameters. First, there is the slug of the new user role. In our case this is simply client. Next, it takes in the full name of the user role (the one that will be displayed in the dropdown menu). For our example we used “Client Account”.
Third, and most importantly, there is an array of arguments that give the permissions to the user role. These are obviously the most important part of this function. You can read through the permissions and it should be pretty obvious what most of them do. However, there are some that are a little confusing. The level_# permissions all give the permissions of one of the default user roles built in to WordPress. Their conversion is as follows:
- User Level 0 converts to Subscriber
- User Level 1 converts to Contributor
- User Level 2 converts to Author
- User Level 3 converts to Editor
- User Level 4 converts to Editor
- User Level 5 converts to Editor
- User Level 6 converts to Editor
- User Level 7 converts to Editor
- User Level 8 converts to Administrator
- User Level 9 converts to Administrator
- User Level 10 converts to Administrator
//via WordPress Codex
I usually don’t use these and prefer to just denote everything myself (hence why they are commented out). If you have any questions about any of the other permissions, please check out the WordPress Codex page on Roles and Capabilities.
Let’s say that on top of creating your own custom user role, you also want to remove some of the default WordPress user roles to simplify your website. This can be easily achieved using the remove_role( … ) function. This function allows you to remove a user role by passing in the slug name. For example, if we only wanted to have our custom client role and the administrator role, we could add the following to our make_custom_user_role() function:
This would remove all the default user roles leaving us with only the administrator and our custom client account user roles. I want to finish off by showing the complete code for the plugin that creates this custom user role:
As always thank you for reading and please share it around as much as you can! Please feel free to put any suggestions or ideas for future tutorials in the comments section below.