![]()
One of my favorite web development blogs is Scotch.io. They provide a huge variety of articles and tutorials aimed at making you a better web developer. All their content is usually super up to date with modern trends and they use a lot of great practices – it’s clear their goal is to teach how to do something the correct way, not just the easiest way.
What’s more is they have their very own Vagrant Box called the Scotch Box that works especially well for WordPress development. This isn’t to say that the box is limited to just WordPress development though – I also got a Laravel site running in no time.
In this article I want to go through getting the Scotch Box onto your local machine and getting a WordPress site up and running inside of it. Before you can get started with any of that you have to install Vagrant itself as well as Virtual Box (or some equivalent that works with Vagrant, but Virtual Box is the most supported so I would go with it). Both of these are a simple download and then install from the downloaded file – there’s no technical trickery required.
Scotch Box Technicals
Right from the Scotch Box website:
Scotch Box is a preconfigured Vagrant Box with a full array of LAMP Stack features to get you up and running with Vagrant in no time.
A lot of PHP websites and applications don’t require much server configuration or overhead at first. This box should have all your needs for doing basic development so you don’t have to worry about configuring Vagrant and you can simply focus on your code.
No provisioning tools or setup is really even required with Scotch Box. Since everything is packaged into the box, running “vagrant” is super fast, you’ll never have to worry about your environment breaking with updates, and you won’t need Internet to code.
Useful Things Included
- PHP 5.5
- No Internet connection required
- PHP errors turned on
- Laravel and WordPress ready (and others)
- Operating System agnostic
- Goodbye XAMPP / WAMP
- New Vagrant version? Update worry free. ScotchBox is very reliable with a lesser chance of breaking with various updates
- Bootstrap and jQuery are saved in the server’s home folder in case you don’t have Internet (usually plains, trains or cars)
- Chef and Puppet ready in case you want to add extra features on Vagrant Up
- Super easy database access and control
- MIT License
Server
- Apache
- Vim
- MySQL
- PHP 5.5
- Ruby
- Git
- Screen
- Composer
- Laravel Installer
- cURL
- GD and Imagick
- Mcrypt
- Memcache and Memcached
Front End
- NPM
- Grunt
- Bower
- Yeoman
- Gulp
This may look like a huge and possibly intimidating list – but remember that all of this is include but you don’t have to use any all of it. Getting a WordPress site up and running takes almost no effort at all, so don’t let the big list freak you out. Besides, when you decide to take the plunge and use Composer to manage your PHP dependencies then the Scotch Box will still have you covered!
Vagrant Up and Running
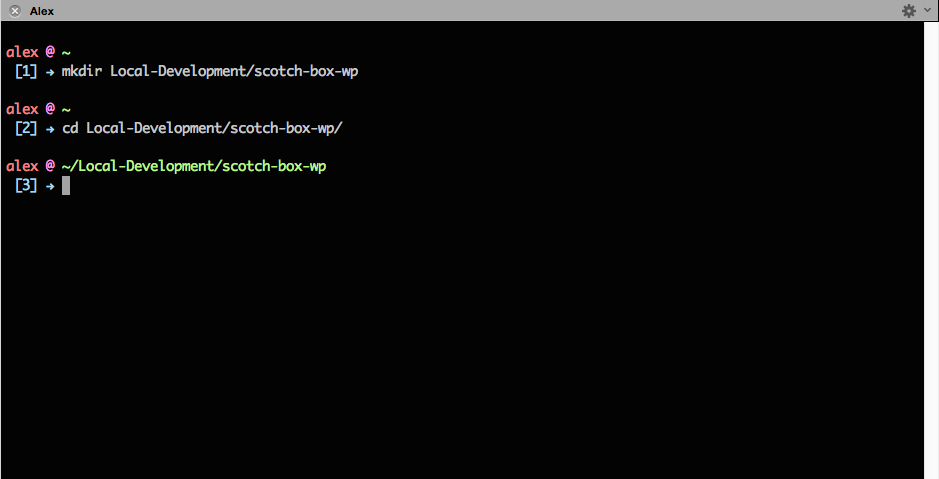
The first thing you will want to do is create a folder for your project. Vagrant uses a “folder for each project” type of structure, so the first thing you’ll want to do is create a folder for your project. Check out the terminal command below but feel free to your project anywhere you like:
Just a note, if you like my terminal you can find an entire article I did on the Customizing Your Terminal which contains the aesthetic changes I made to iTerm as well as a copy of my .bash_profile file. If you are interested in that then please feel free to check that out.
Clone the GitHub Repo
Next we need to get the actual Scotch Box box. The preferred method for getting the box presented on the Scotch Box website is to use Git to clone it. This will setup a Git repo inside of our folder as well which is excellent because we want to be using version control anyway. To clone the repository run the following command:
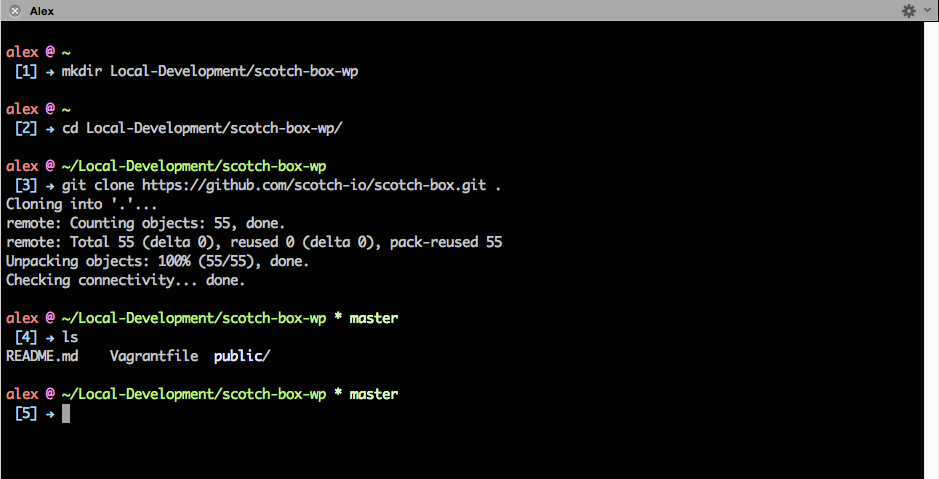
As you can see from the output of the ls command I executed your project folder should now contain a README.md file, Vagrantfile file, and a public/ directory. That’s all you need!
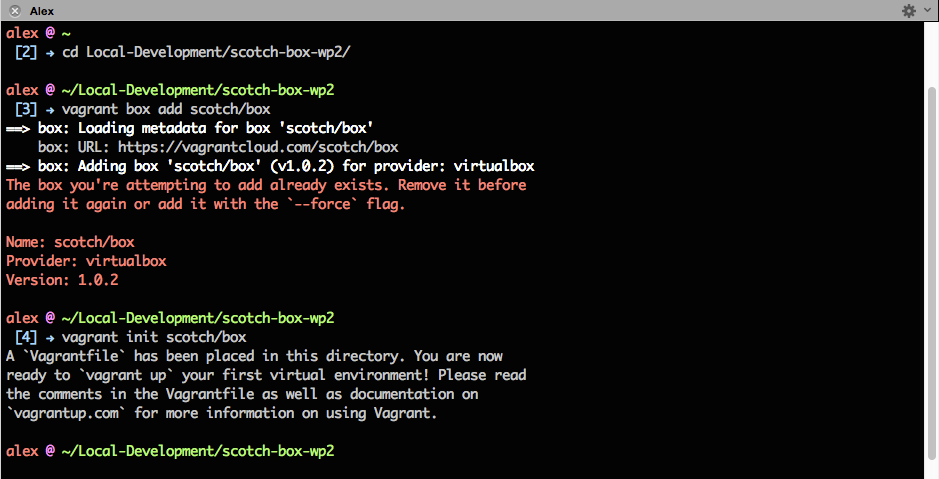
Vagrant Init
There is one more way you can create the project using vagrant init. Depending on how you learned Vagrant this might be what you’re more used to since it’s the method presented in the Vagrant Docs. However, for the Scotch Box I prefer to use the Git method simply because it creates a Git project for you right off the bat (because you should be using version control anyway) and because it simply has one less command to run. Please note that this is an alternative approach to cloning the GitHub repository, so if you did the steps above you don’t have to execute the following. I just wanted to make sure I covered the alternative way to do it:
Vagrant Up
The time has come to get our Scotch Box up and running. Luckily Vagrant makes it as simple as running one command:
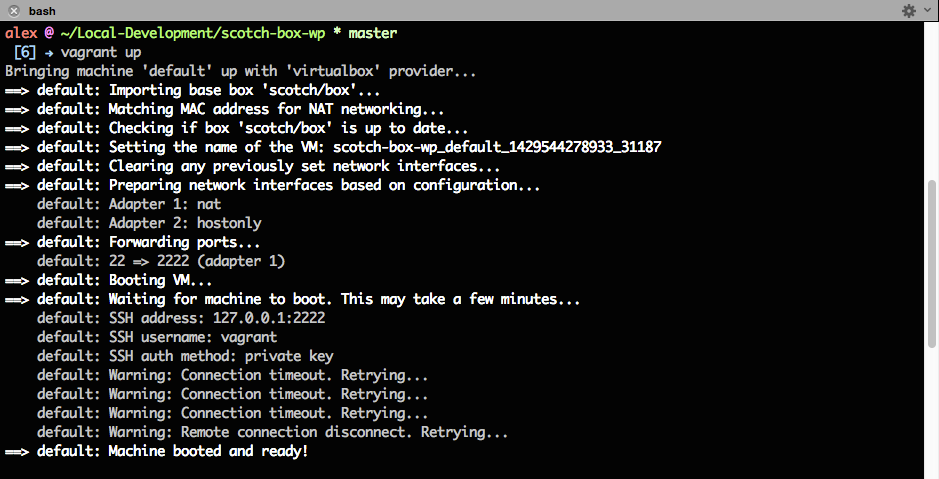
There may be a little more output at the bottom when you run the command on your machine but that’s nothing to worry about. If you have a problem where you keep getting Connection timeout. Retrying… over and over for a long time, check this Stack Overflow Question for a possible solution. Once you’re machine is booted up and ready though you should be able to access it at http://192.168.33.10/. If you see the splash page – congrats you have Scotch Box up and running!
WordPress
Getting WordPress working on your new Scotch Box couldn’t be easier. All you have to do is empty out the public/ folder and copy a free WordPress install in its place. For the wp-config.php file use the following information:
Database Name:
scotchbox
Database User:
root
Database Password:
root
Database Host:
localhost
Once you have that all that done you have a very easy to use local development environment for your WordPress. The one thing that I should mention and that I did wish that the Scotch Box came with PHPMyAdmin just so I didn’t have to install another program. Maybe I just like working with as few applications as possible and that’s not a good mentality but who knows. From the Scotch Box site:
You’ll need to download either Sequel Pro or Navicat or some other desktop database client. Switching to one of these from phpMyAdmin will be a life changing experience so just do it already.
Important Things to Know
Shutting Down and Starting Back Up
There are a few more commands to know that are extremely important. Firstly, if you want to shutdown your Virtual Machine use the following command:
Then to get the machine back up and running simply run the following command and the server will resume:
If you are looking to actually get rid of your server entirely then run the following command:
This will permanently delete everything in your project folder, so make sure you do this if you’re done with your project to save space.
SSH
If you are looking to SSH into your machine the command is very simple:
This will bring you into the machine just like it would on any other server. Remember that the Scotch Box is a LAMP stack so if you are used to using Apache then things should look relatively familiar to you. The public/ folder is contained in /var/www/public/ if you are looking around for it, which again is your standard one site Apache setup.
Conclusion
That’s it – once you have all that installed you’re good to go and development something awesome. In a future tutorial I plan to go over setting up a Laravel project using the Scotch Box as well for those who are interested in that. Hopefully this will really get you into or at least get you to try using Vagrant as your local development environment. I really think Vagrant is an awesome tool and extremely easy to use once you’ve tried it a couple times for yourself, especially with things like the Scotch Box making it that much easier.
As always thank you for reading and please share it around as much as you can! Please feel free to put any suggestions or ideas for future tutorials in the comments section below.