
jQuery is a fast, small, and feature-rich JavaScript library. It makes things like HTML document traversal and manipulation, event handling, animation, and Ajax much simpler with an easy-to-use API that works across a multitude of browsers. With a combination of versatility and extensibility, jQuery has changed the way that millions of people write JavaScript. – jQuery.com
jQuery is easily one of the most popular libraries available on the web. According to recent research by W3Techs, jQuery is now used on half of all websites worldwide (via SitePoint). It allows you to actively change content based on users interactions with your site, resulting in a much more interactive experience. jQuery also makes it super easy to find elements in the DOM (more on this later), change HTML content, listen for user interaction, animate content on the page, and talk over the network in order to get new content for the page.
In order to get through this tutorial you should probably know your way around at least a little HTML, CSS and JavaScript. If you aren’t an expert front-end developer that’s fine, but some general knowledge should be there. You should also read my Basic jQuery Tutorial Part I before going into this tutorial. You will also need the follow two files from the previous tutorial.
Selecting Child Nodes
To start out this tutorial we will take a look at some very basic selection statements. Lets now take a look at selecting parent and children nodes using jQuery. In our jQuery-Tutorial.html file, we can see that our list has the id “todolist”. Let’s try to select all the <li> elements of that list. We can do this by again using CSS selectors:
This will take every <li> element under the <ul id=”todolist”> and change the text to “I am a child of todolist”. The changes every list element we have to “I am a child of todolist”.
As you can see from the example above, the first element in the jQuery selector is the parent. In this case the parent is “#todolist”. The next selector is then the child. The child in our example is “li”. Note that there is a space between the parent and child.
However, this is not the fastest way to select children of a node. The fastest way is to chain together jQuery methods rather than using child selectors. This technique is known as traversing the DOM. For example, we can change the code above to read:
This will load faster and is better practice. It does take more code, but this technique should be used everywhere you can.
Remember to traverse the DOM rather than using multi-part selection statements!
What if we want to only select a direct child of the parent node? For example, change your jQuery-Tutorial.html file to include the following:
If we were to run our same jQuery on this list, ALL of the <li> elements text values would be changed.
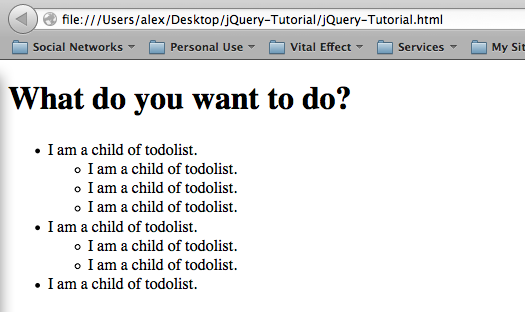
Now let’s say we don’t want that to happen, instead we only want direct children to be changed over. We can do this by including the “>” to our selection statement. Note the direction, because if you use the wrong direction then it won’t work. We can change our jQuery-Tutorial.js file to read the following:
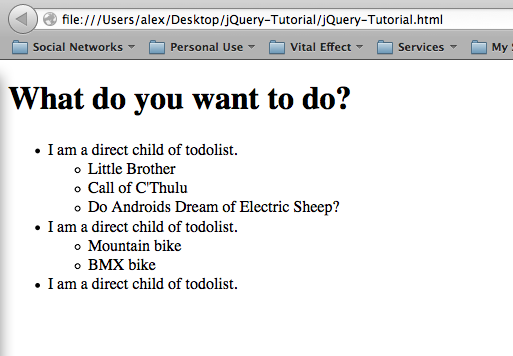
BUT WAIT! We said that we should always use traversing rather than selection statements like this. The correct traversal method for selecting only direct children is to use the .children() method. Change your code to read:
This will only change over the direct children of the <ul id=”todolist”>. The result will be the following (which is exactly what we wanted):
Selecting parent nodes is performed in the exact same way, except using .parent() rather than .child(). If you would like more information about .parent() please see the API page.
Pseudo Class Selectors
When working with CSS, you are able to use pseudo selectors such as :first, :last, :even and :odd. This feature has also made its way into jQuery. If you modify your jQuery-Tutorials.js file to have:
then the output from our HTML page will be:
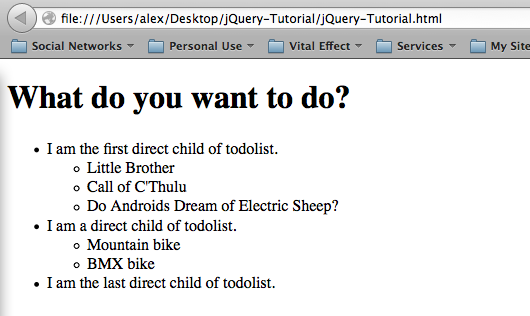
As you can see, both the first and last pseudo-selectors work exactly the same way in jQuery as they do in CSS. All the other pseudo-selectors will work the same way as well.
BUT WAIT! Pseudo-selectors can be modified to use the traversal technique rather than multi-part selection statements. We will get the same results as above, but be faster if we modify our code above to:
This is a very useful feature to remember for long lists, because you will be able to change the color of even and odd list items to make them easier to read for your users. Just remember when using .odd() and .even() that the index starts at 0, so the first element will actually be odd.
Adding to the DOM
Let’s say that we don’t want to modify elements anymore but rather add new elements to the DOM. During this part of the tutorial we will use four main methods:
- .append(<element>)
- .prepend(<element>)
- .after(<element>)
- .before(<element>)
Before we get into each of the methods above, its important to note how to create a proper node in jQuery. The proper way to define a node is as follows (you can change the name to whatever you want, it does NOT have to be called node):
It is important to note the use of the $, which therefore makes this a jQuery node object. You wouldn’t want to define the node by using var node = “<p>This is my node.</p>”; because this is simply a string.
Always make a node object when adding to the DOM!
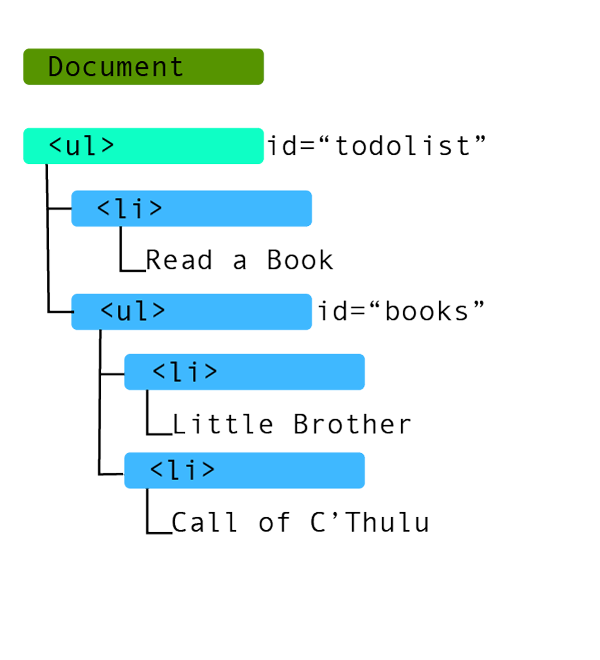
Before you start working on these methods, modify your jQuery-Tutorial.html file to look like the following:
This will produce a DOM for the <ul id=”todolist”> that would look something like this:
.append(<element>);
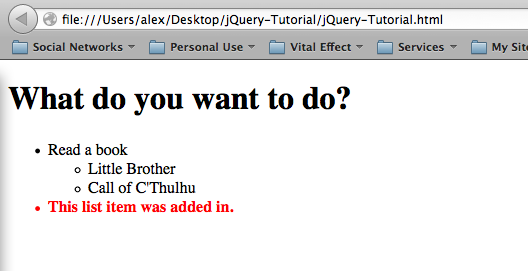
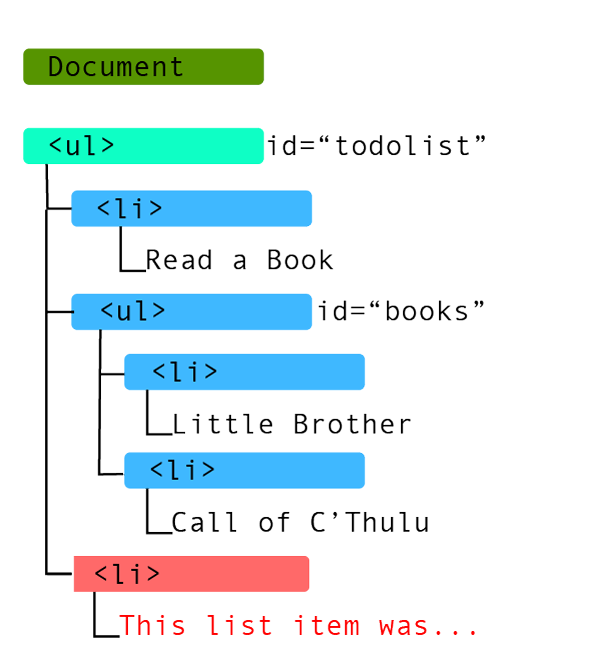
The .append() method adds our node to the very end of the selected element. Please note that the node will be placed INSIDE our selected element. This will become the distinguishing feature between .append() and .after(). If we were to run this append example:
then our node would be appended as the last item of the <ul id=”todolist”>. Notice that the node is placed INSIDE the <ul id=”todolist”>. The end result would look like this:
The DOM model for this .append() looks like:
.prepend(<element>)
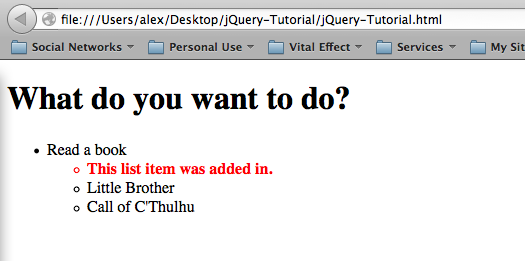
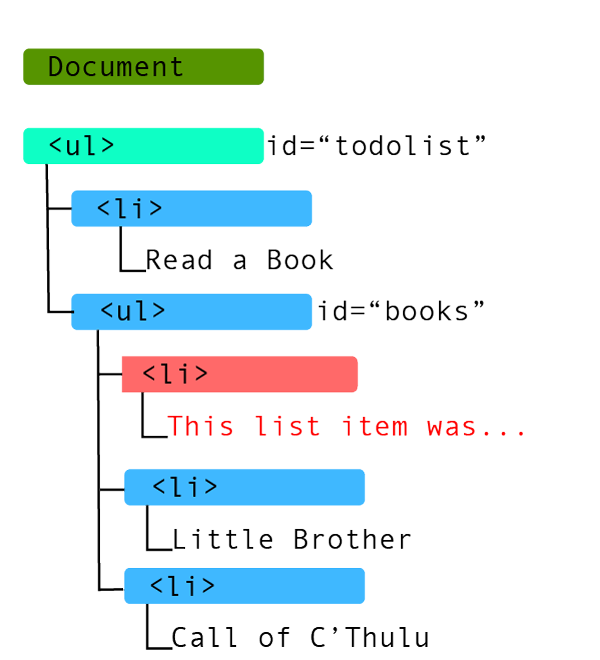
The .prepend() method adds our node to the very start of the selected element. Please note that the node will be placed INSIDE our selected element. If you were to run this prepend example:
then our node would appear as the first list item in the <ul id=”books”>. The output would end up looking like this:
The DOM model for this .prepend() looks like:
.after(<element>)
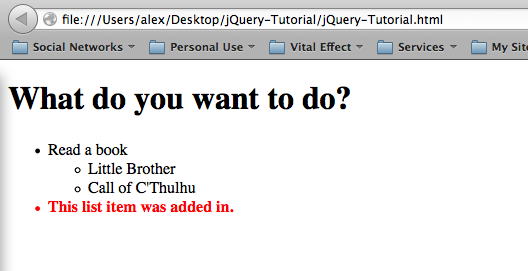
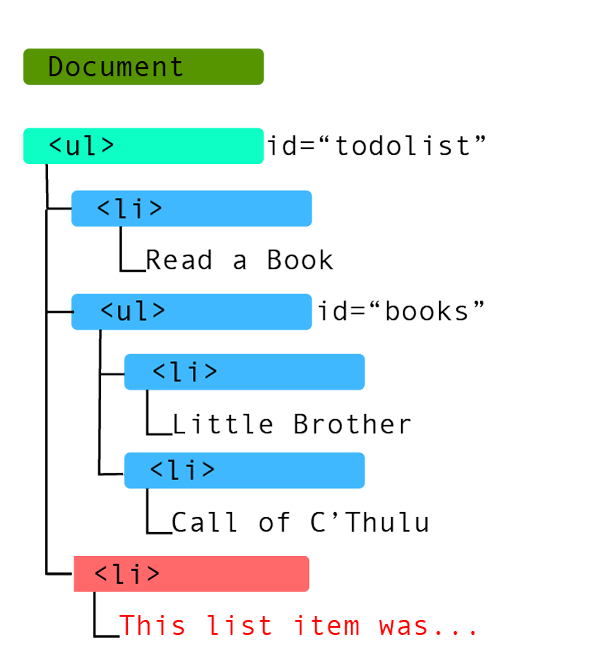
The .after() method adds our node to directly after the end of the selected element. Please note that the node will be placed OUTSIDE our selected element. This is the fundamental difference between .append() and .after(). The .append() method will place the node inside the selected element at the end, where as the .after() method will place the node outside of the selected element. If we were to run this append example:
then we would see that our node has been added as the next <li> item after the <ul id=”books”>. It was NOT added as the last element of <ul id=”books”>, but rather in the <ul id=”todolist”> directly after the <ul id=”books”> (hence the name of the method). The output would look like this:
The DOM model for this .after() example looks like:
.before(<element>)
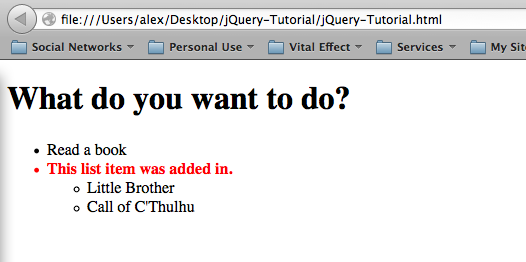
The .before() method adds our node to directly before the end of the selected element. Please note that the node will be placed OUTSIDE our selected element. This is the same principle as .after() compared to .append(). The .before() method will be on the OUTSIDE where as the .prepend() method adds the node to the INSIDE. If we were to run this append example:
then we would see that our node is added before the <ul id=”books”> element. The output would look like this:
The DOM model for this .before() example looks like: 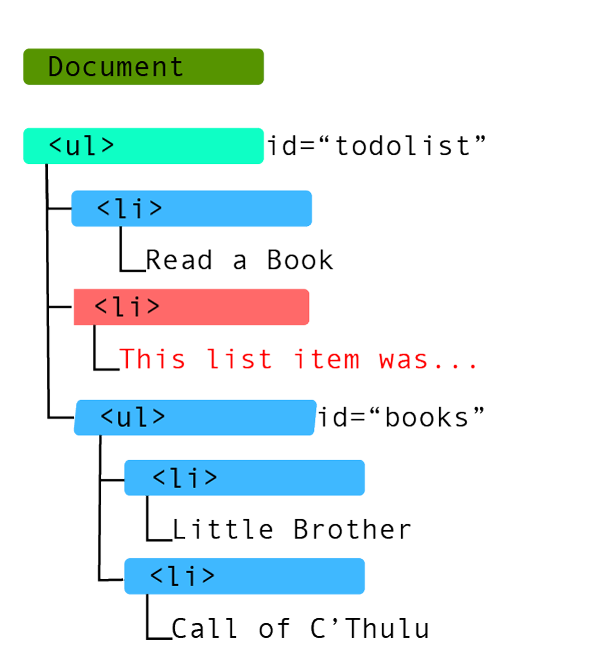 Alternative Syntax
jQuery also has alternative syntax to the four methods mentioned above. These are as follows:
.appendTo(<element>)
is equivalent to
.prependTo(<element>)
is equivalent to
.insertAfter(<element>)
is equivalent to
.insertBefore(<element>)
is equivalent to
This tutorial has gone on pretty long now, so I think I will stop it here and continue in a part 3. Part 3 of the tutorials will start with a basic overview of event handling. This will be followed by use of the $(this) selector to show proper traversal when working with event handlers.
As always thank you for reading and please share it around as much as you can! Please feel free to put any questions, suggestions, or ideas in the comments section below. I would really like to know what kind of tutorials everyone wants me to make.